Secure Delivery via Amazon CloudFront & ACM
To enable secure HTTPS delivery for the website and optimize page loading globally, configure AWS Certificate Manager (ACM) combined with CloudFront.
Step 1: Request SSL/TLS Certificate via ACM
- Search for Certificate Manager on the AWS Console.
- (Important) Switch region to us-east-1 (N. Virginia) (CloudFront requires SSL/TLS certificates to be provisioned in this region to be used).
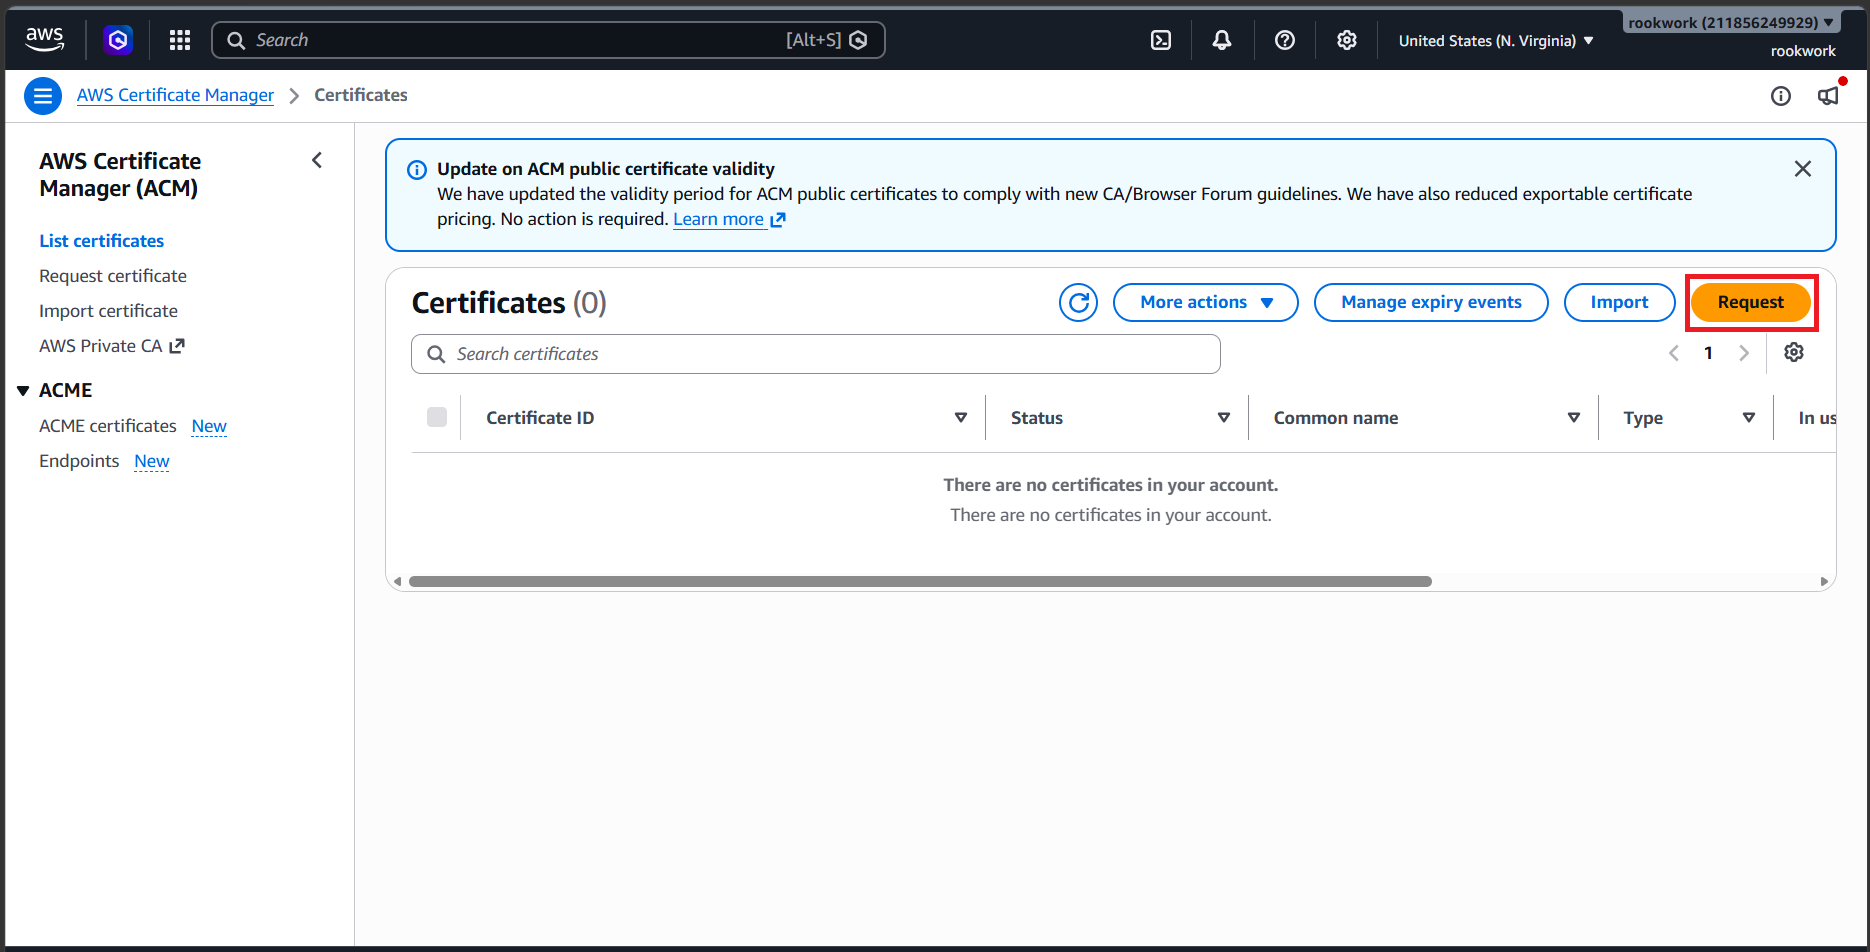
- Click Request certificate, select Request a public certificate, and click Next.
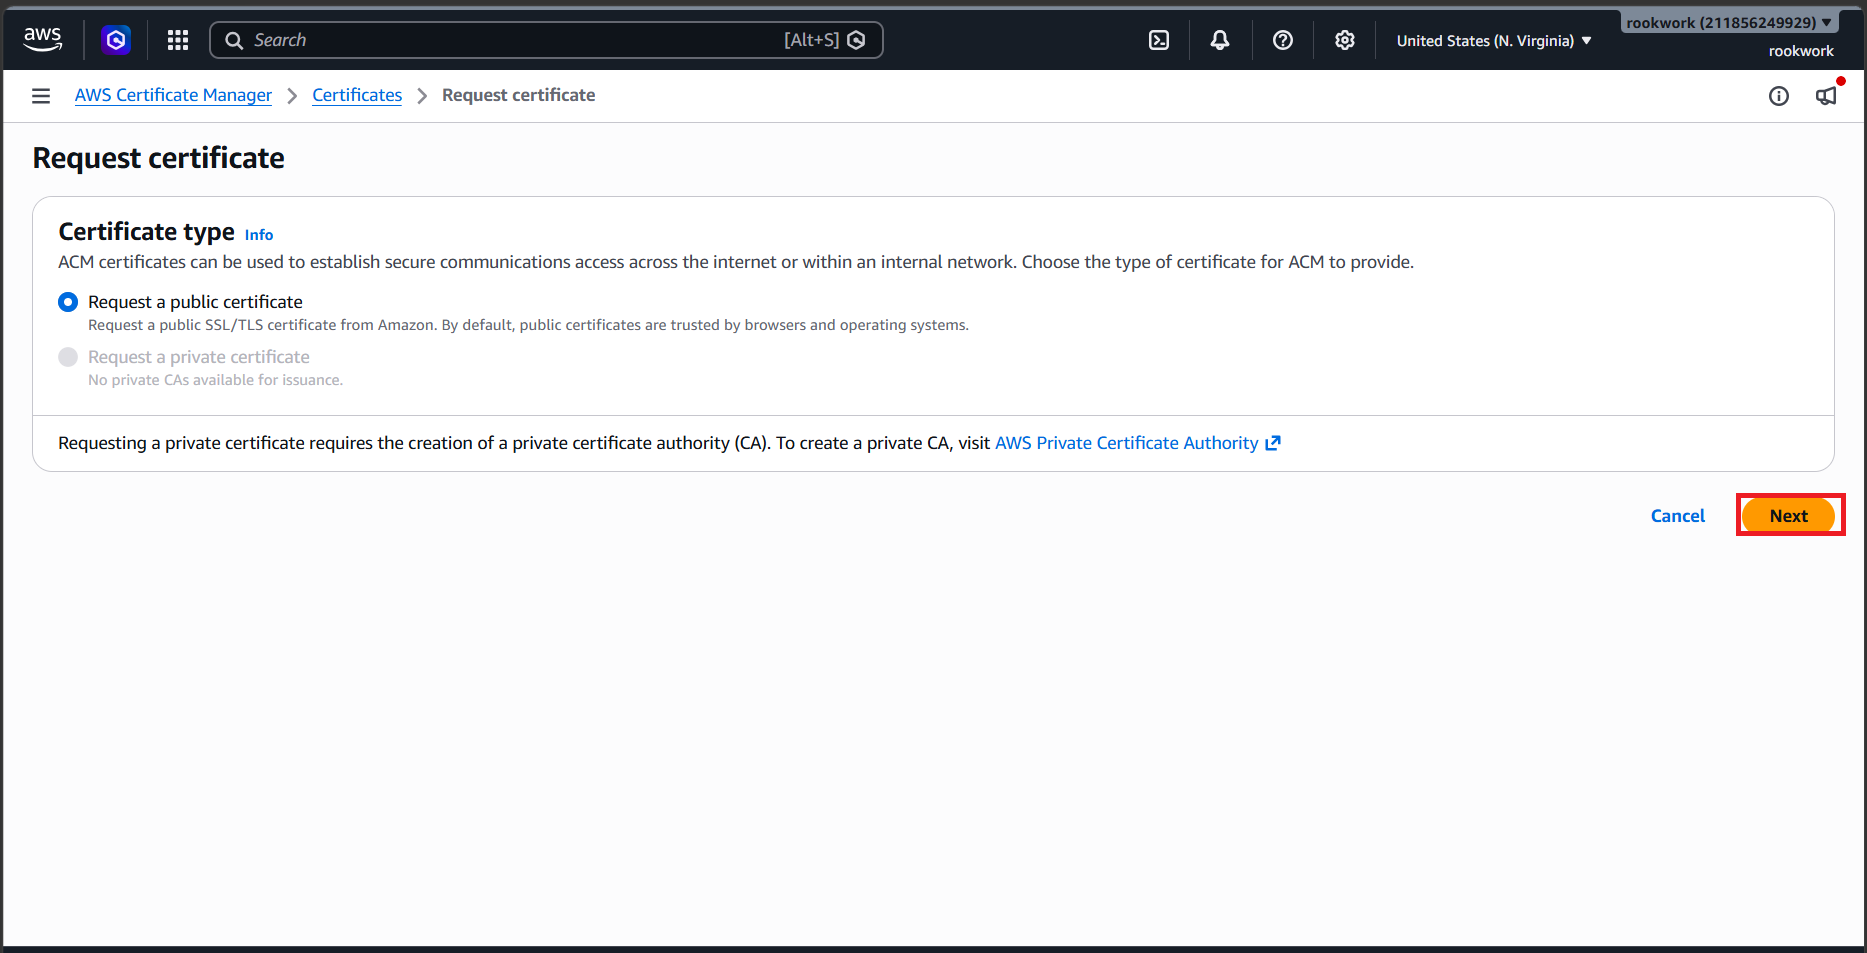
- In the configuration:
- Fully qualified domain name: Enter your domain name (e.g.,
rookwork.asiaand add an additional wildcard domain*.rookwork.asia). - Validation method: Choose DNS validation.
- Fully qualified domain name: Enter your domain name (e.g.,
- Click Request.
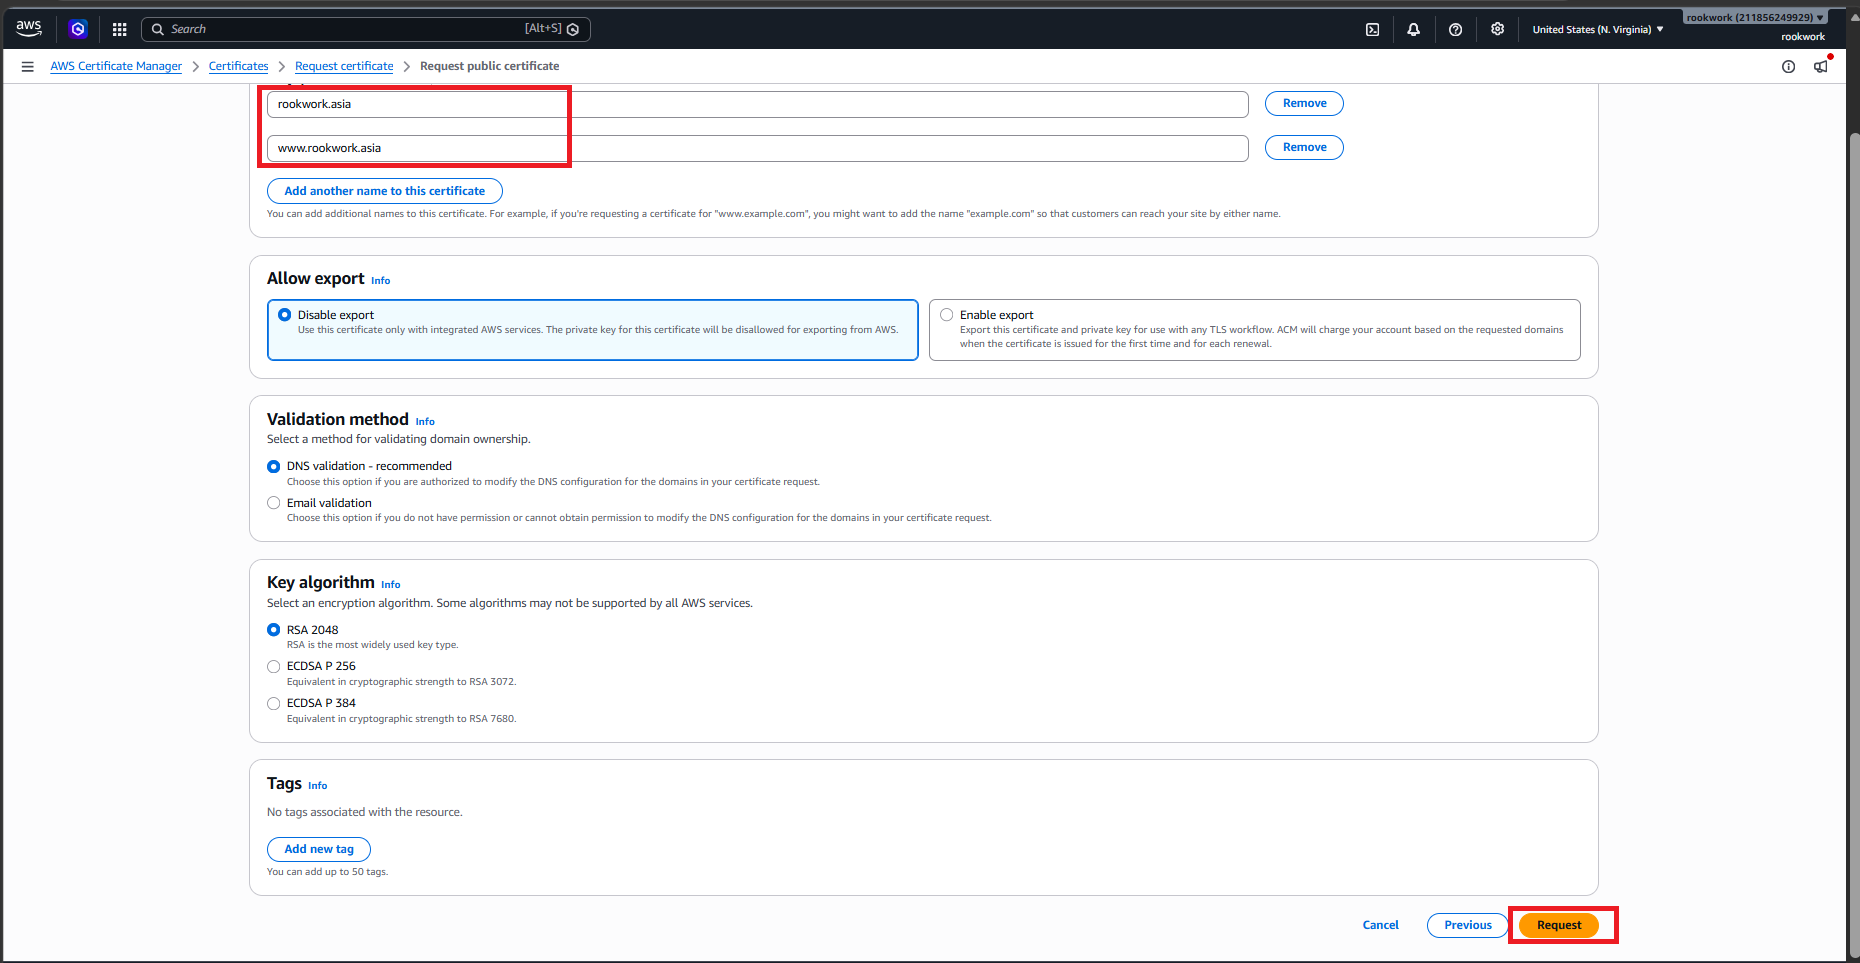
- The initial status will be Pending validation. Click the Certificate ID, and click Create records in Route 53 to automatically generate DNS validation records in Route 53.
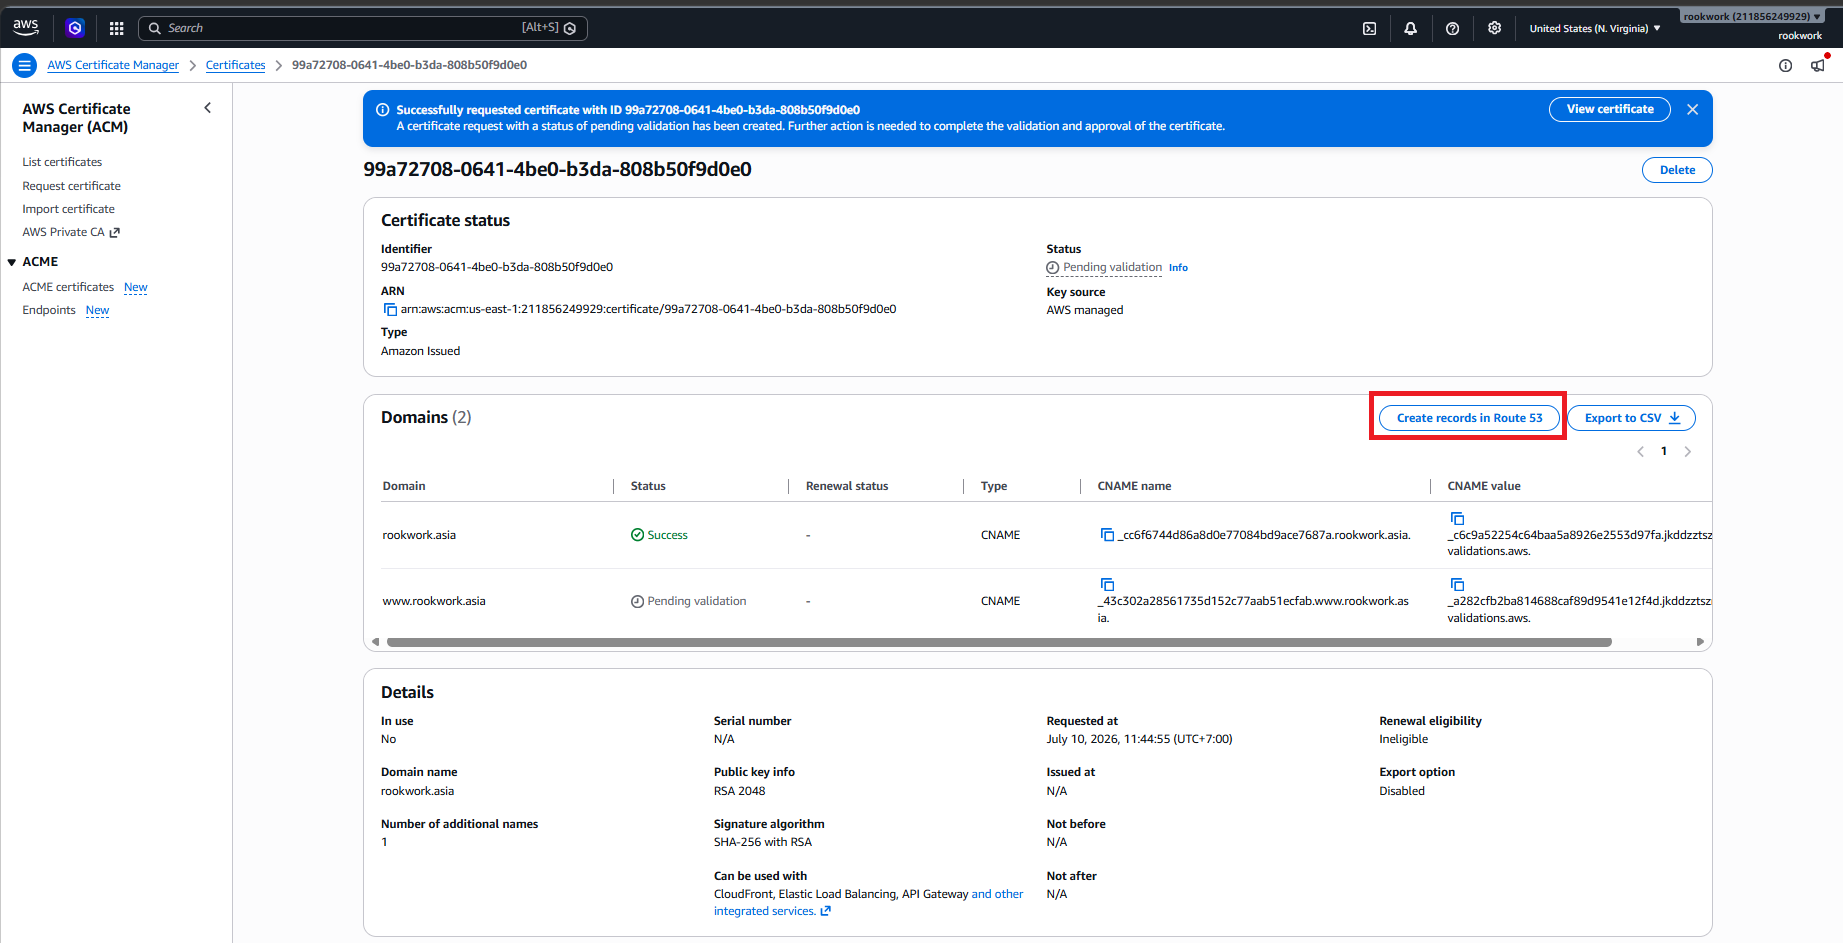
- Wait a few minutes for the status to change to Issued.
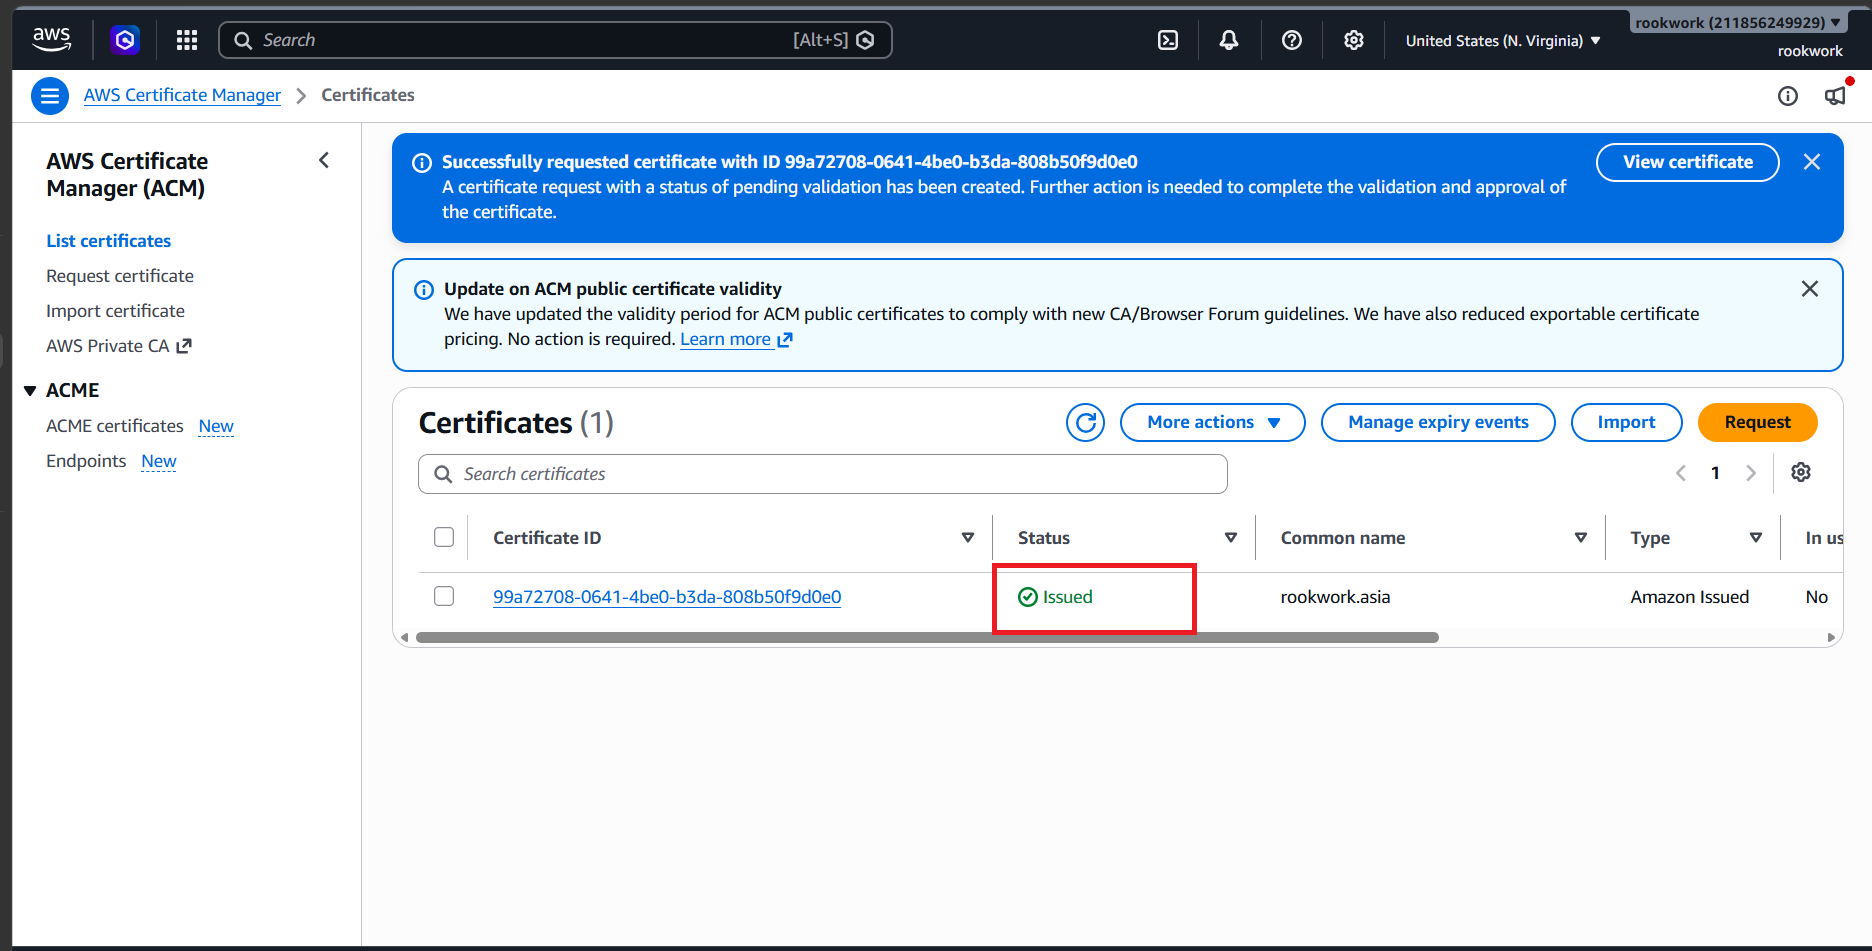
Step 2: Create a CloudFront Distribution
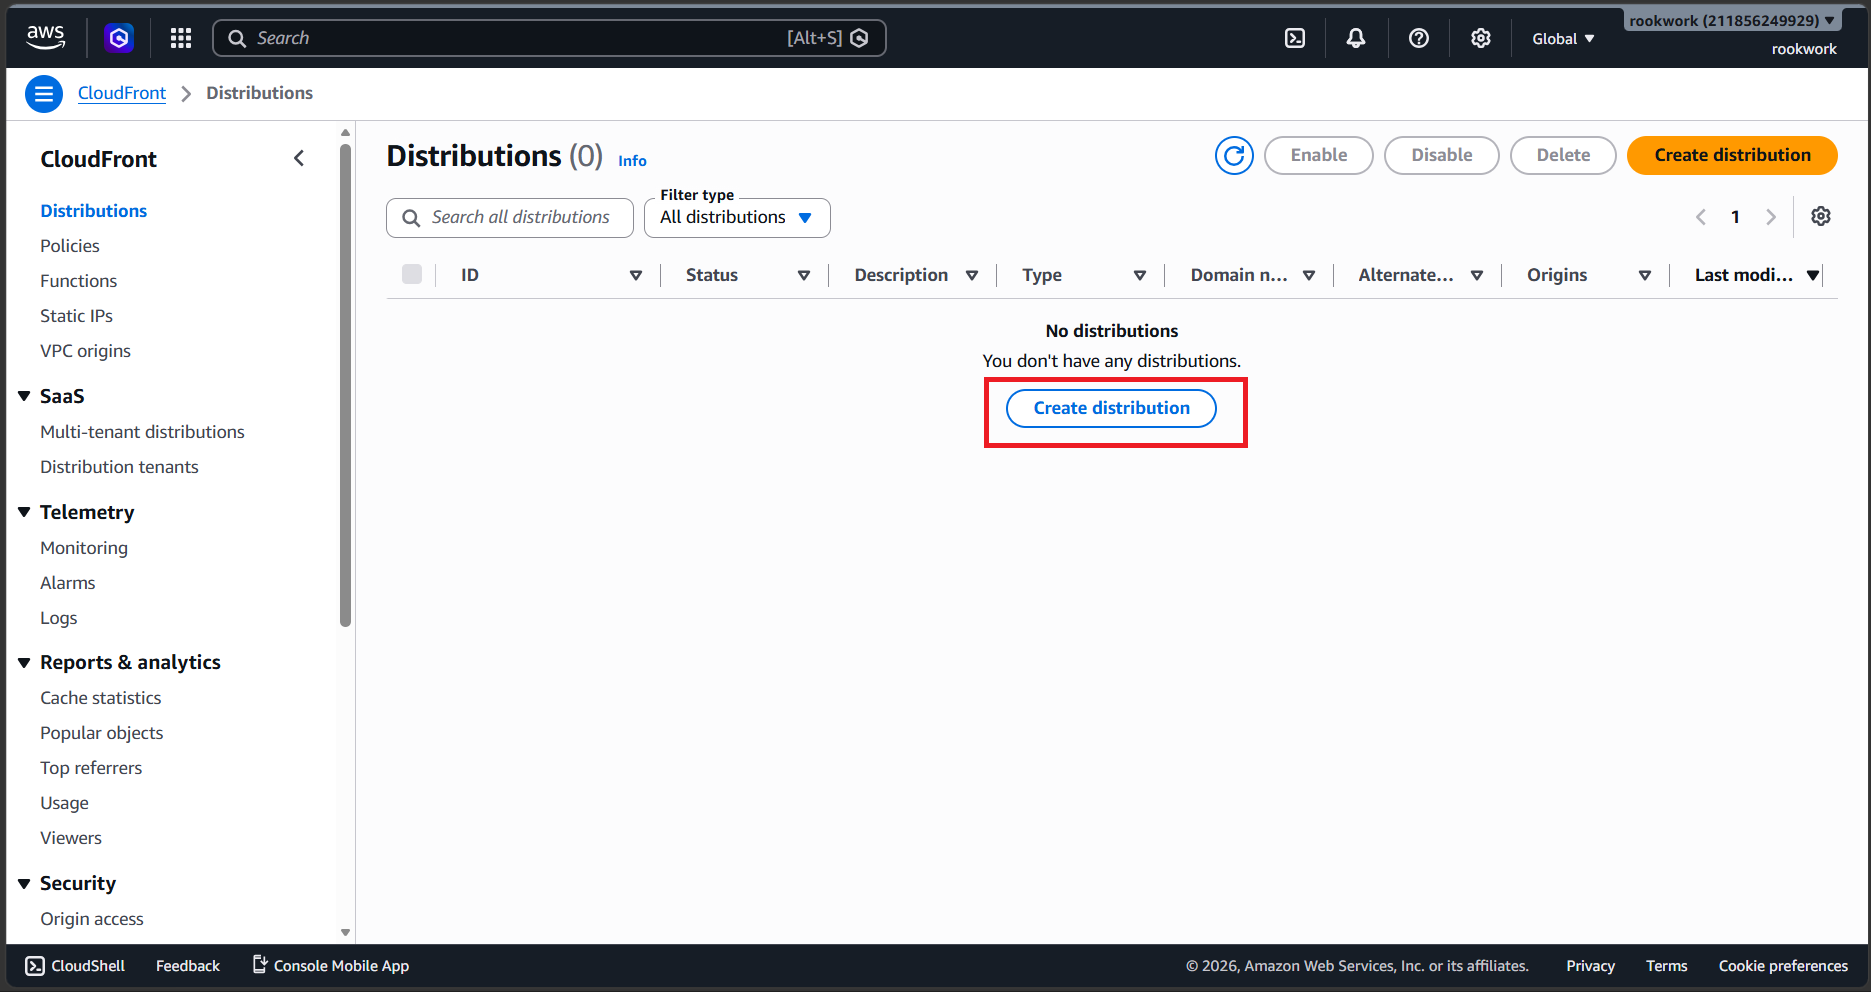
- Search for CloudFront on the AWS Console.
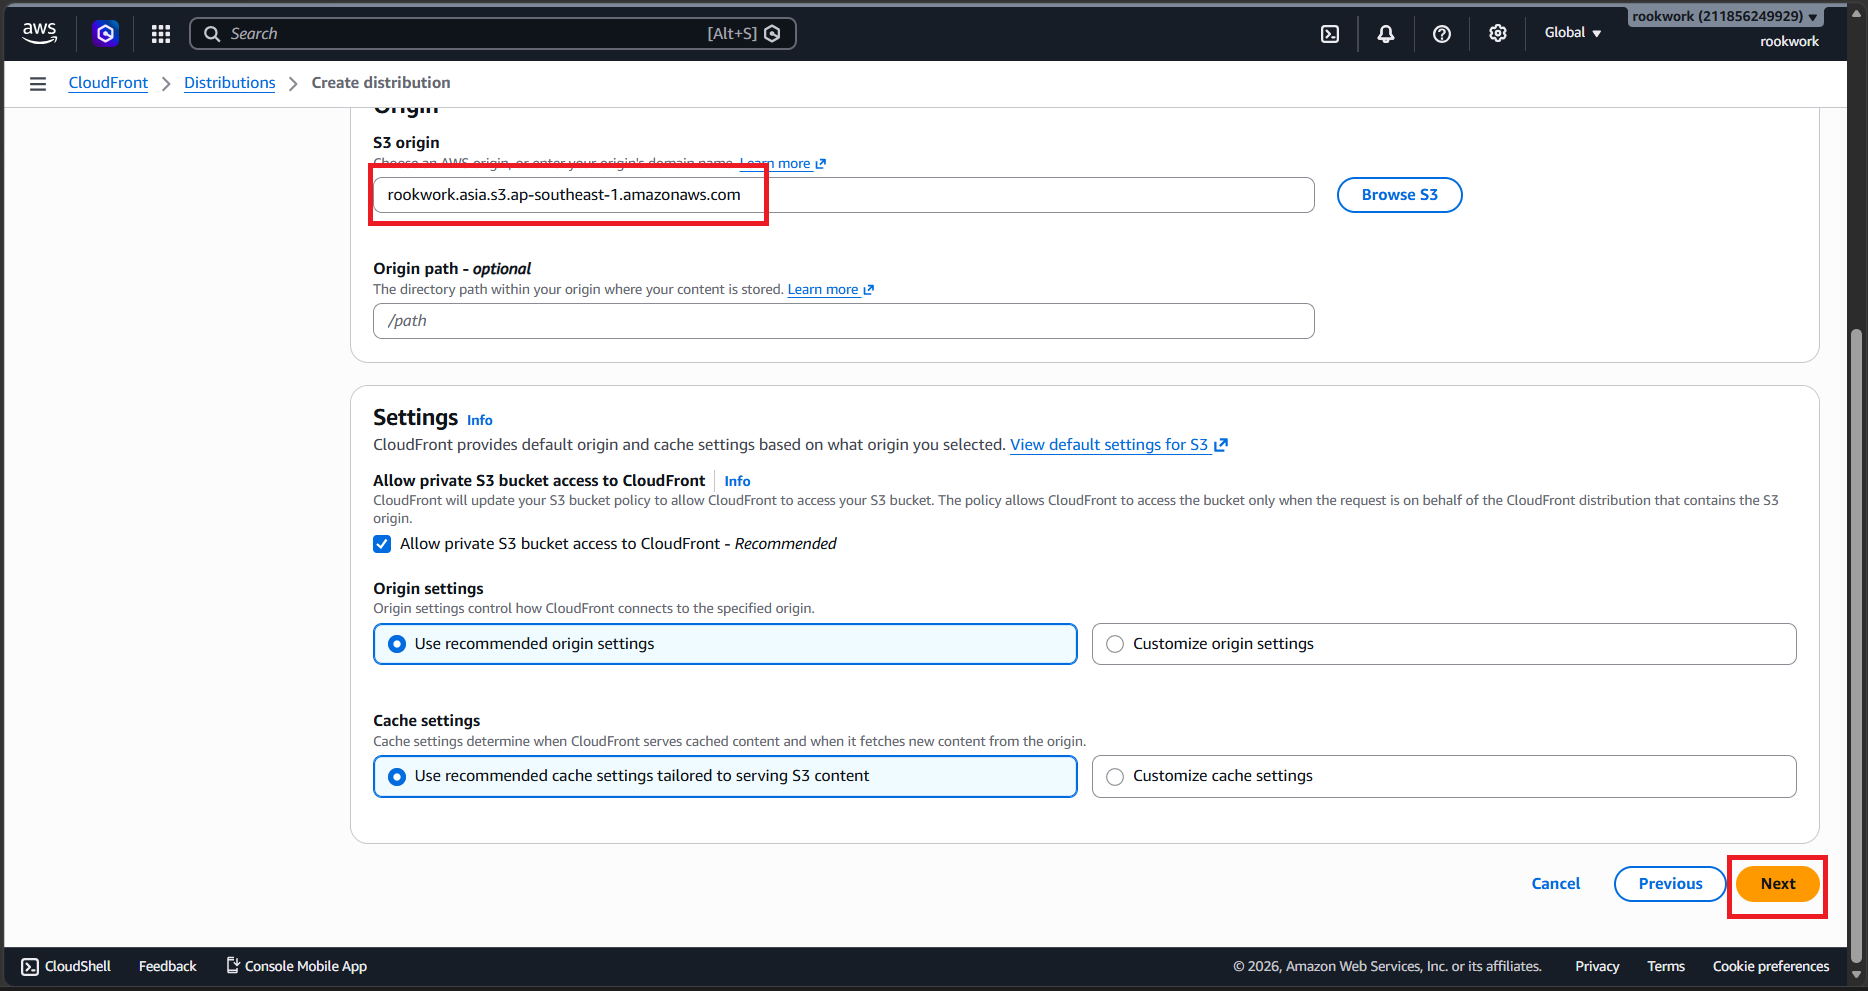
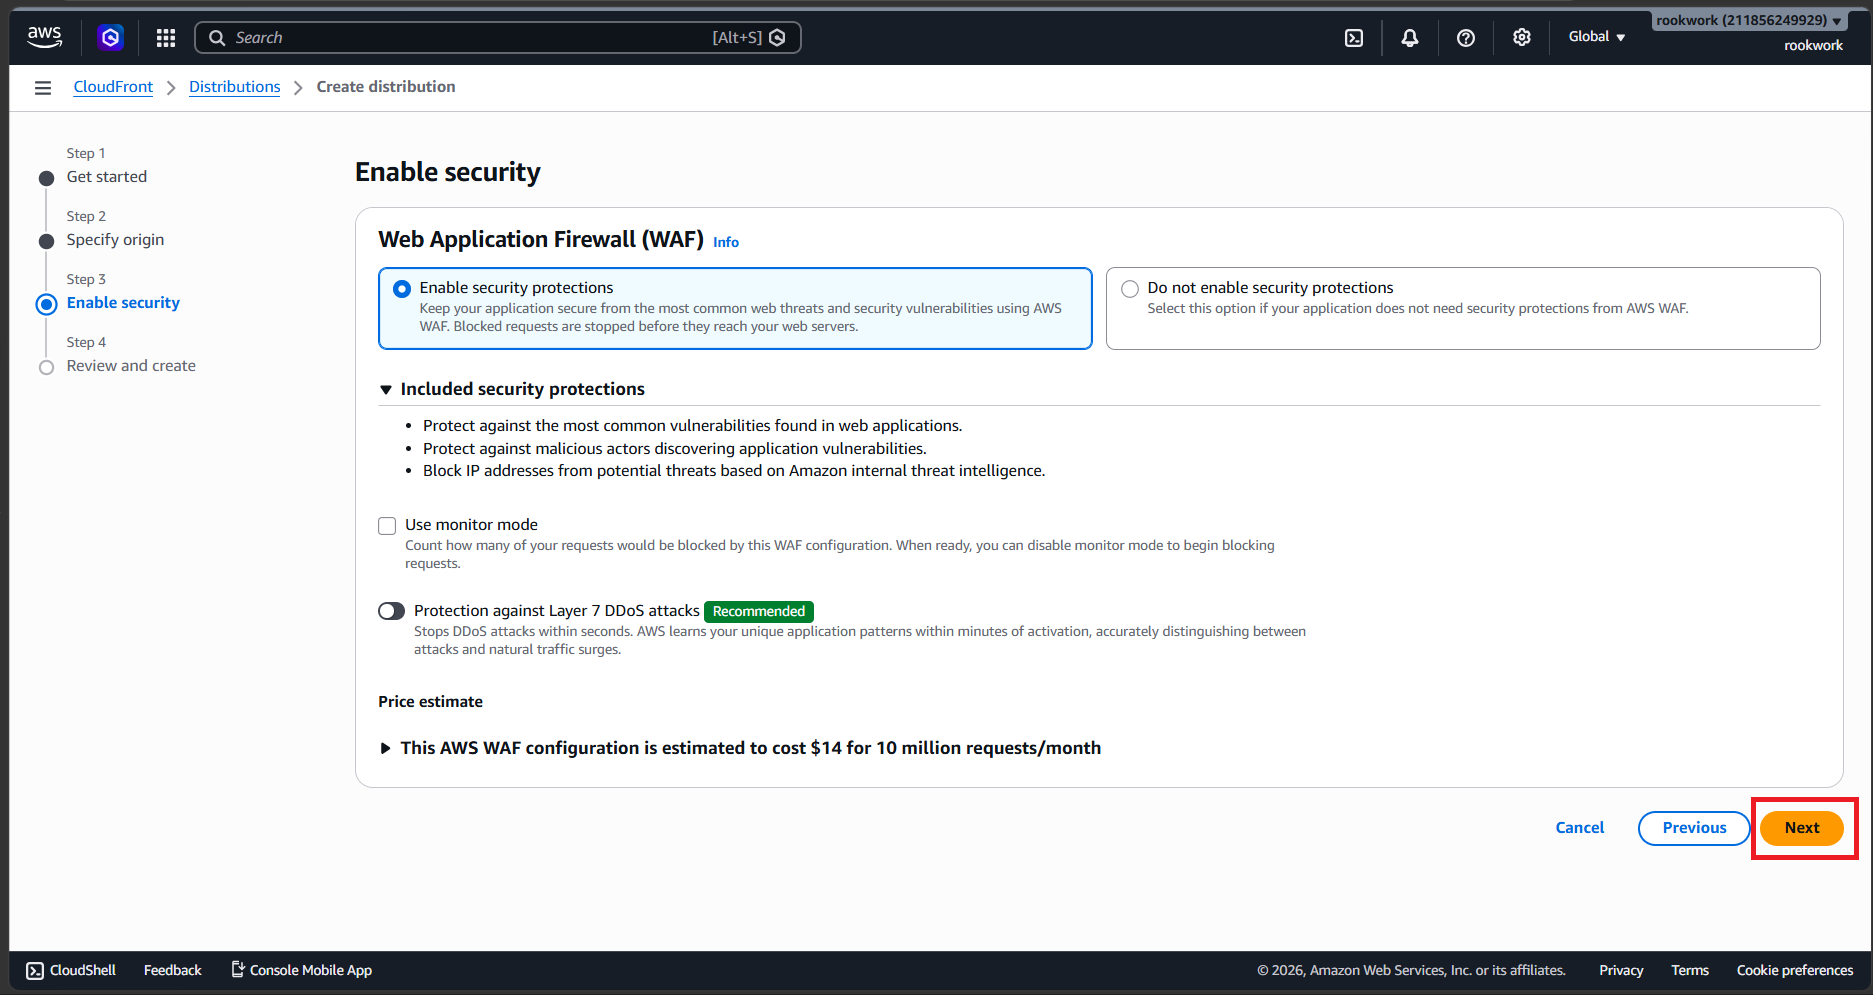
- Click Create distribution.
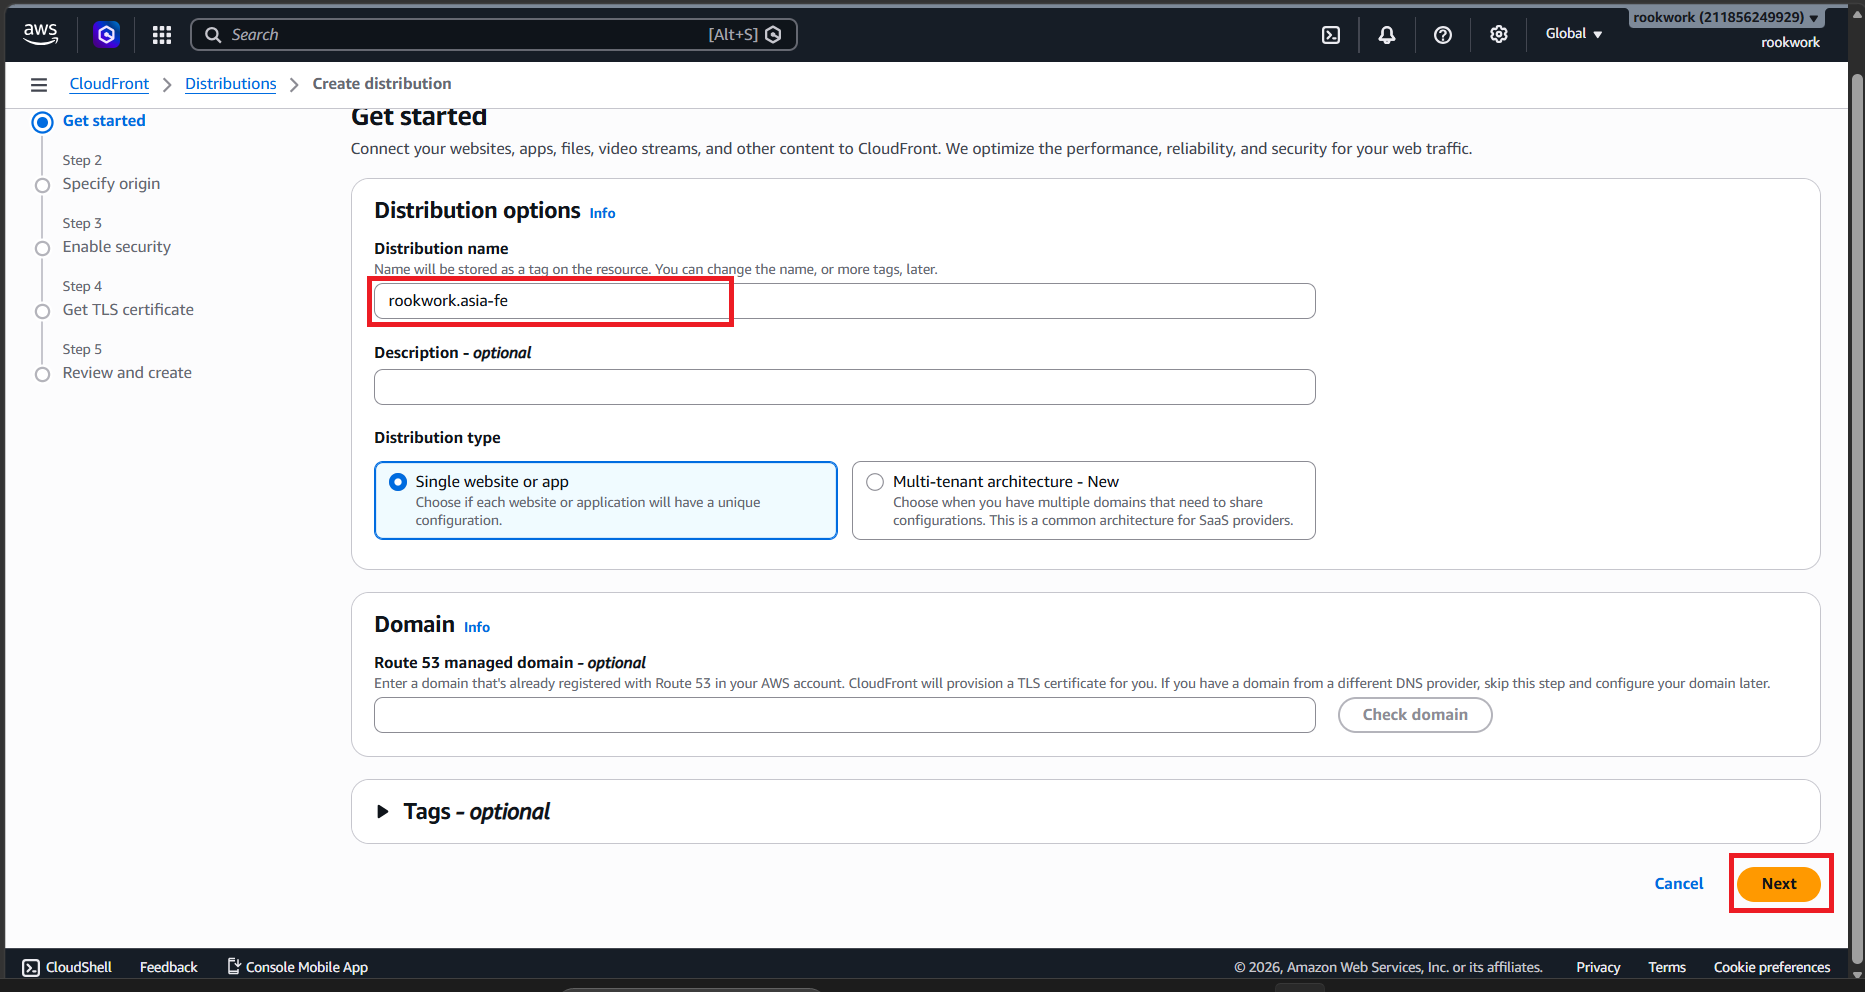
- In the configuration:
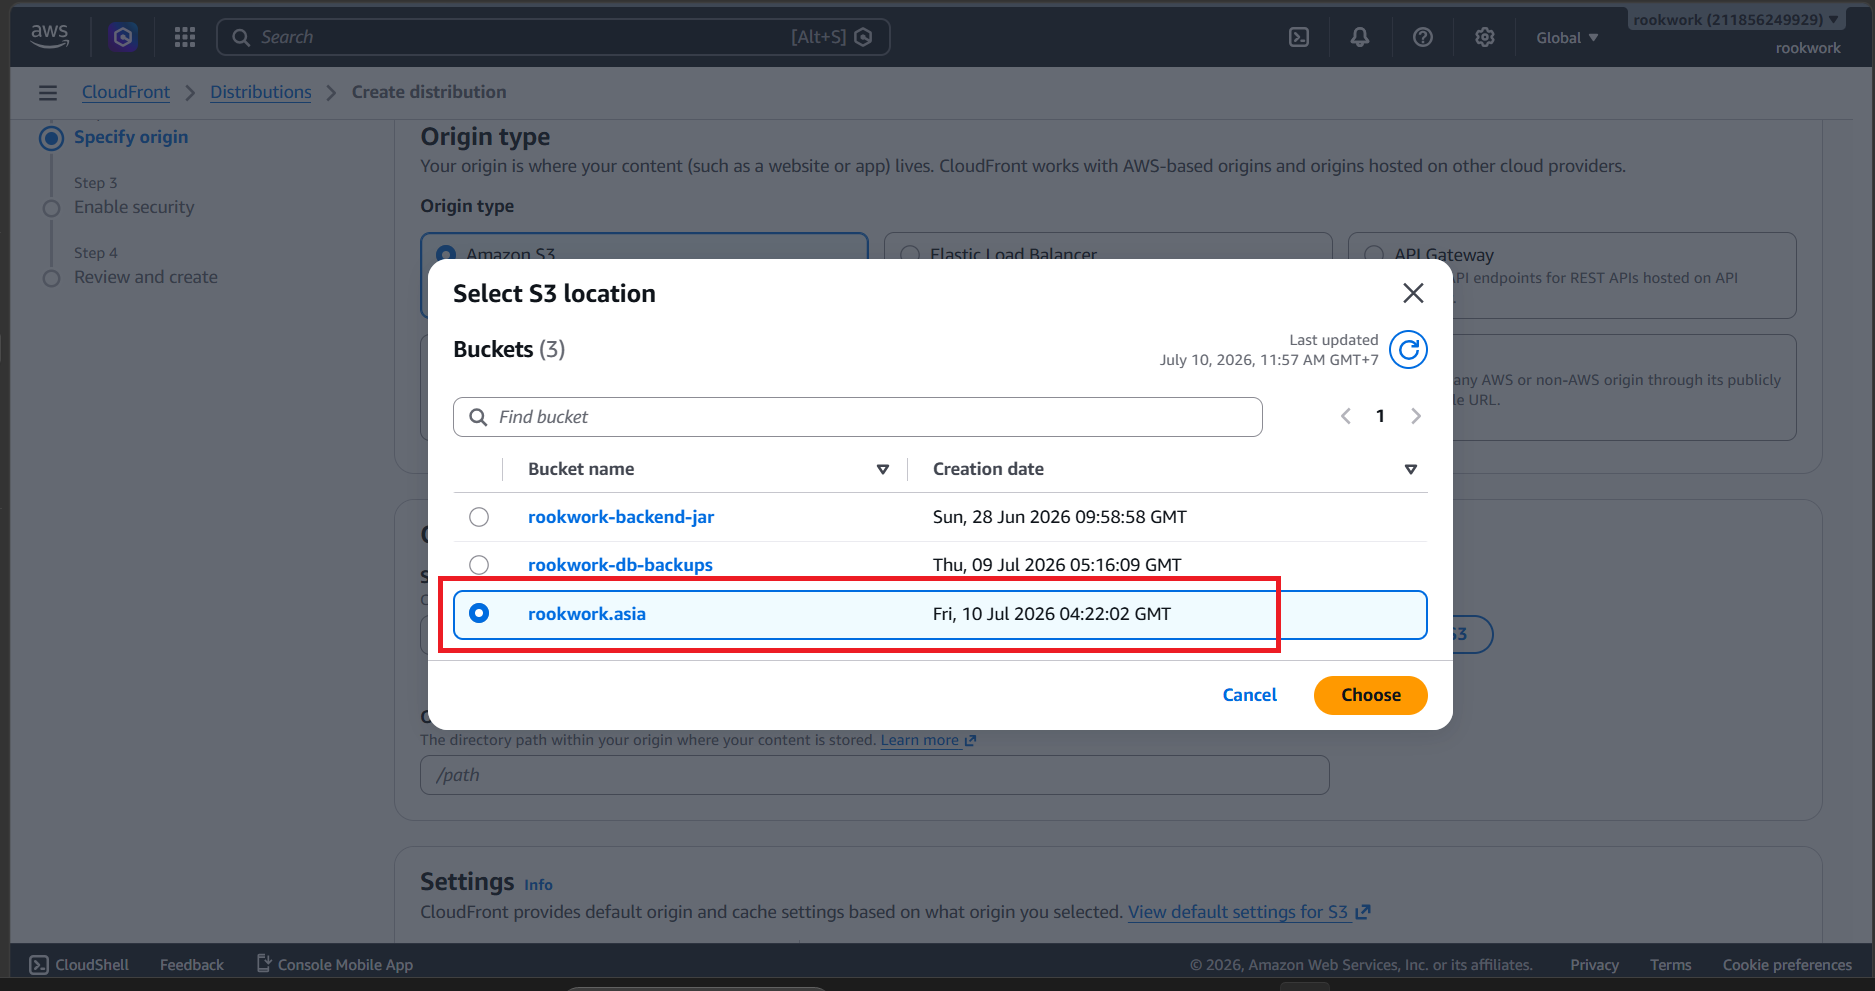
- Origin domain: Select your S3 bucket.
- Origin access: Select Origin access control settings (OAC) (recommended). Click Create control setting, leave default settings, and save.
- Viewer protocol policy: Select Redirect HTTP to HTTPS.
- Alternate domain name (CNAME): Add your domain names (e.g.,
rookwork.asiaandwww.rookwork.asia). - Custom SSL certificate: Select the ACM certificate generated in Step 1.
- Default root object: Enter
index.html.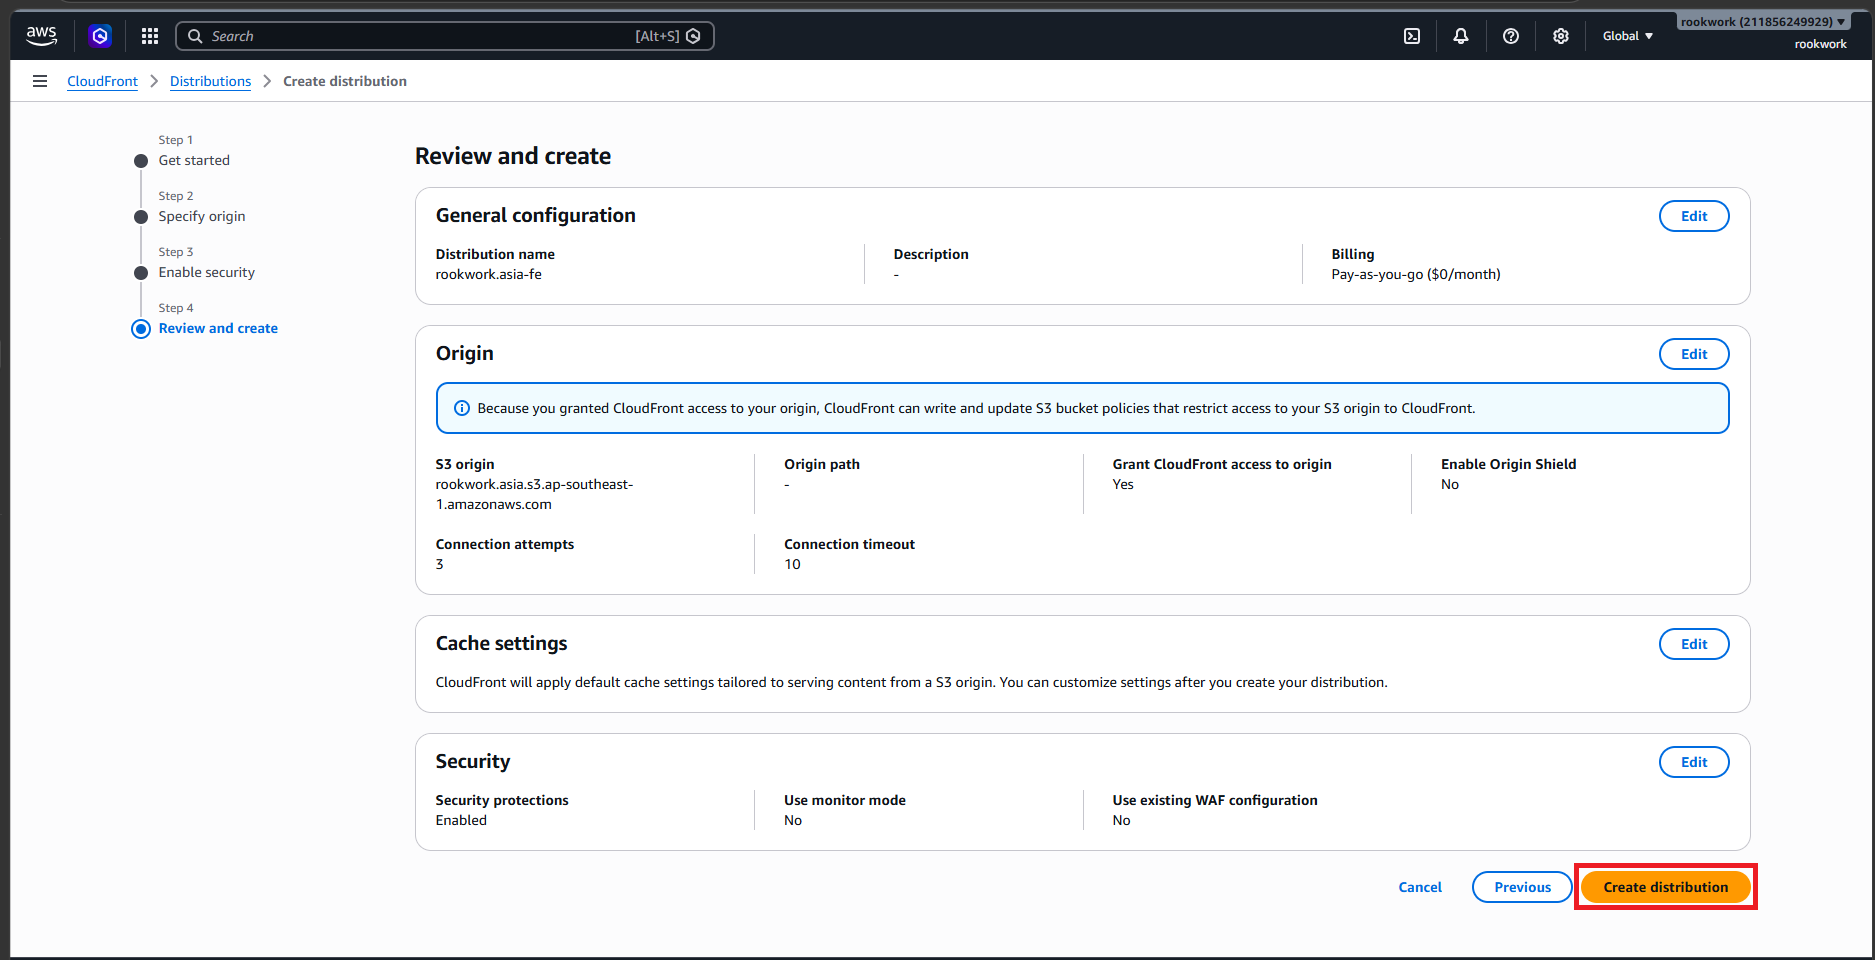
- Origin domain: Select your S3 bucket.
- Click Create distribution.
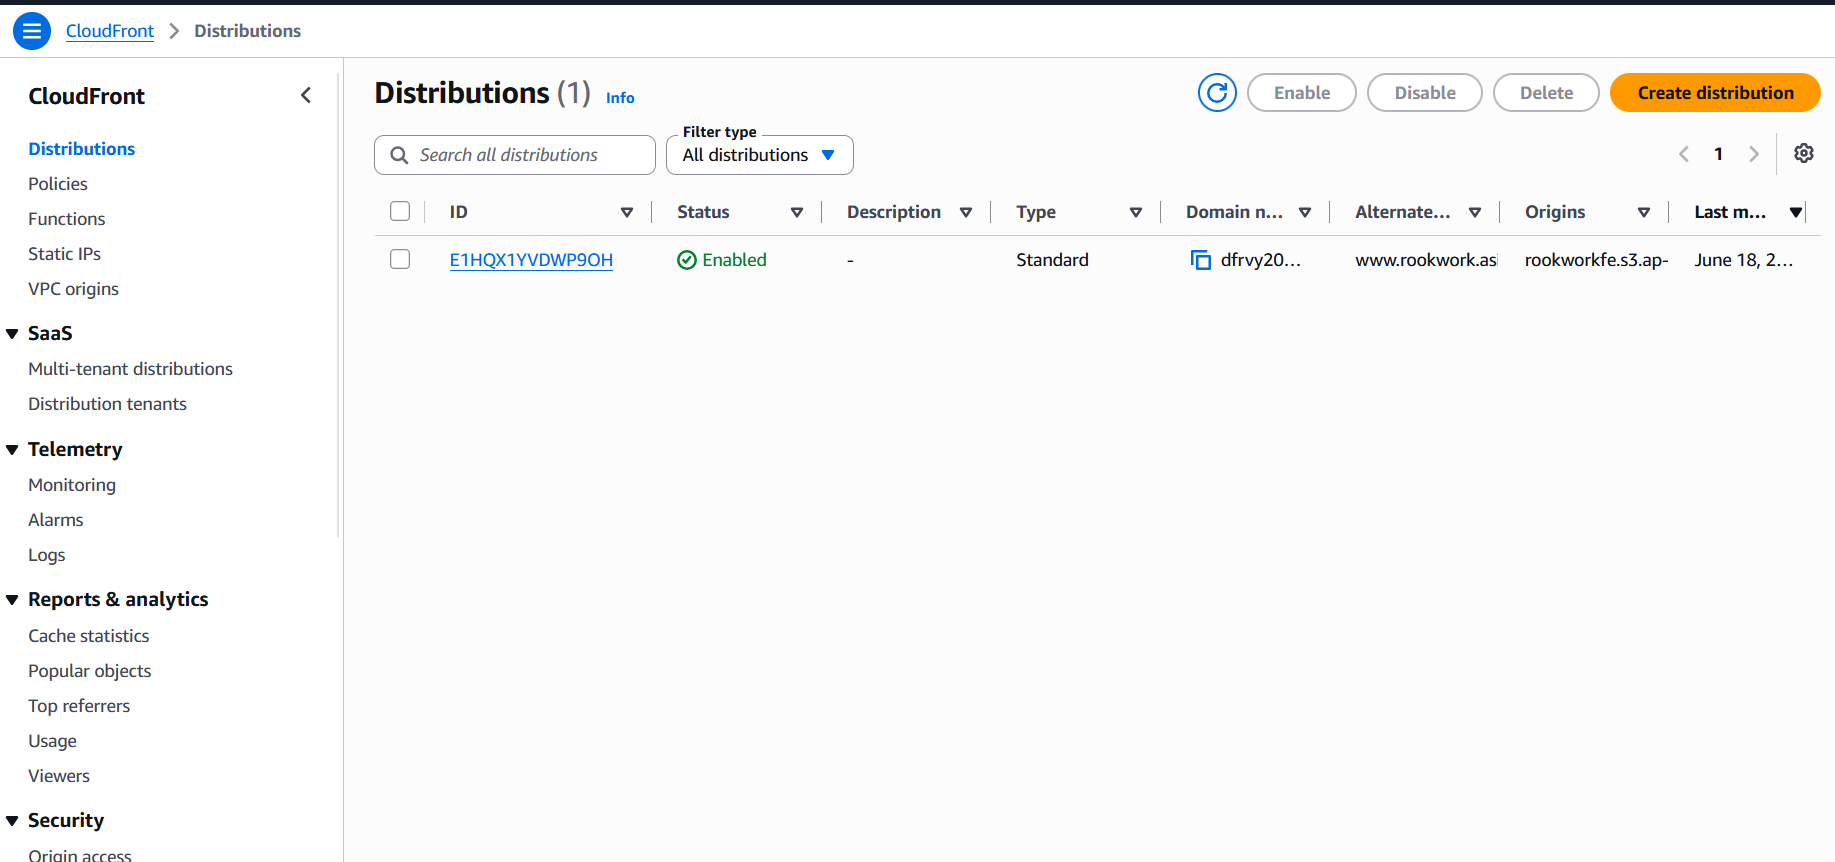
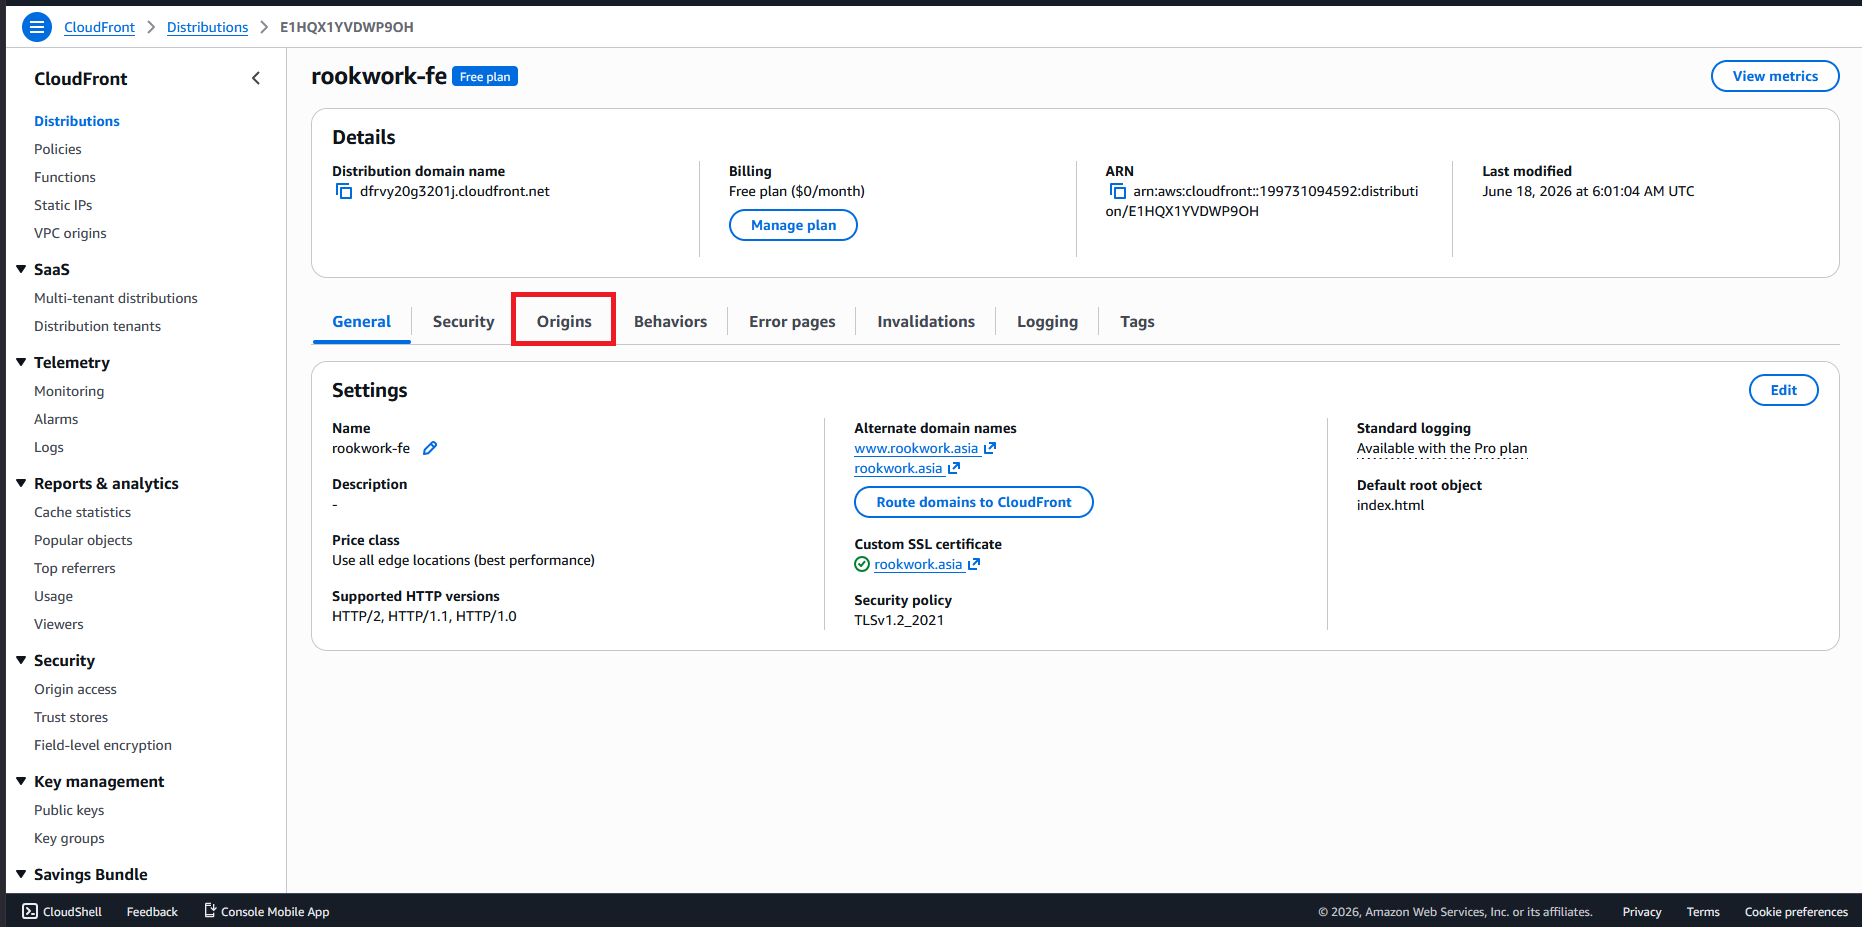
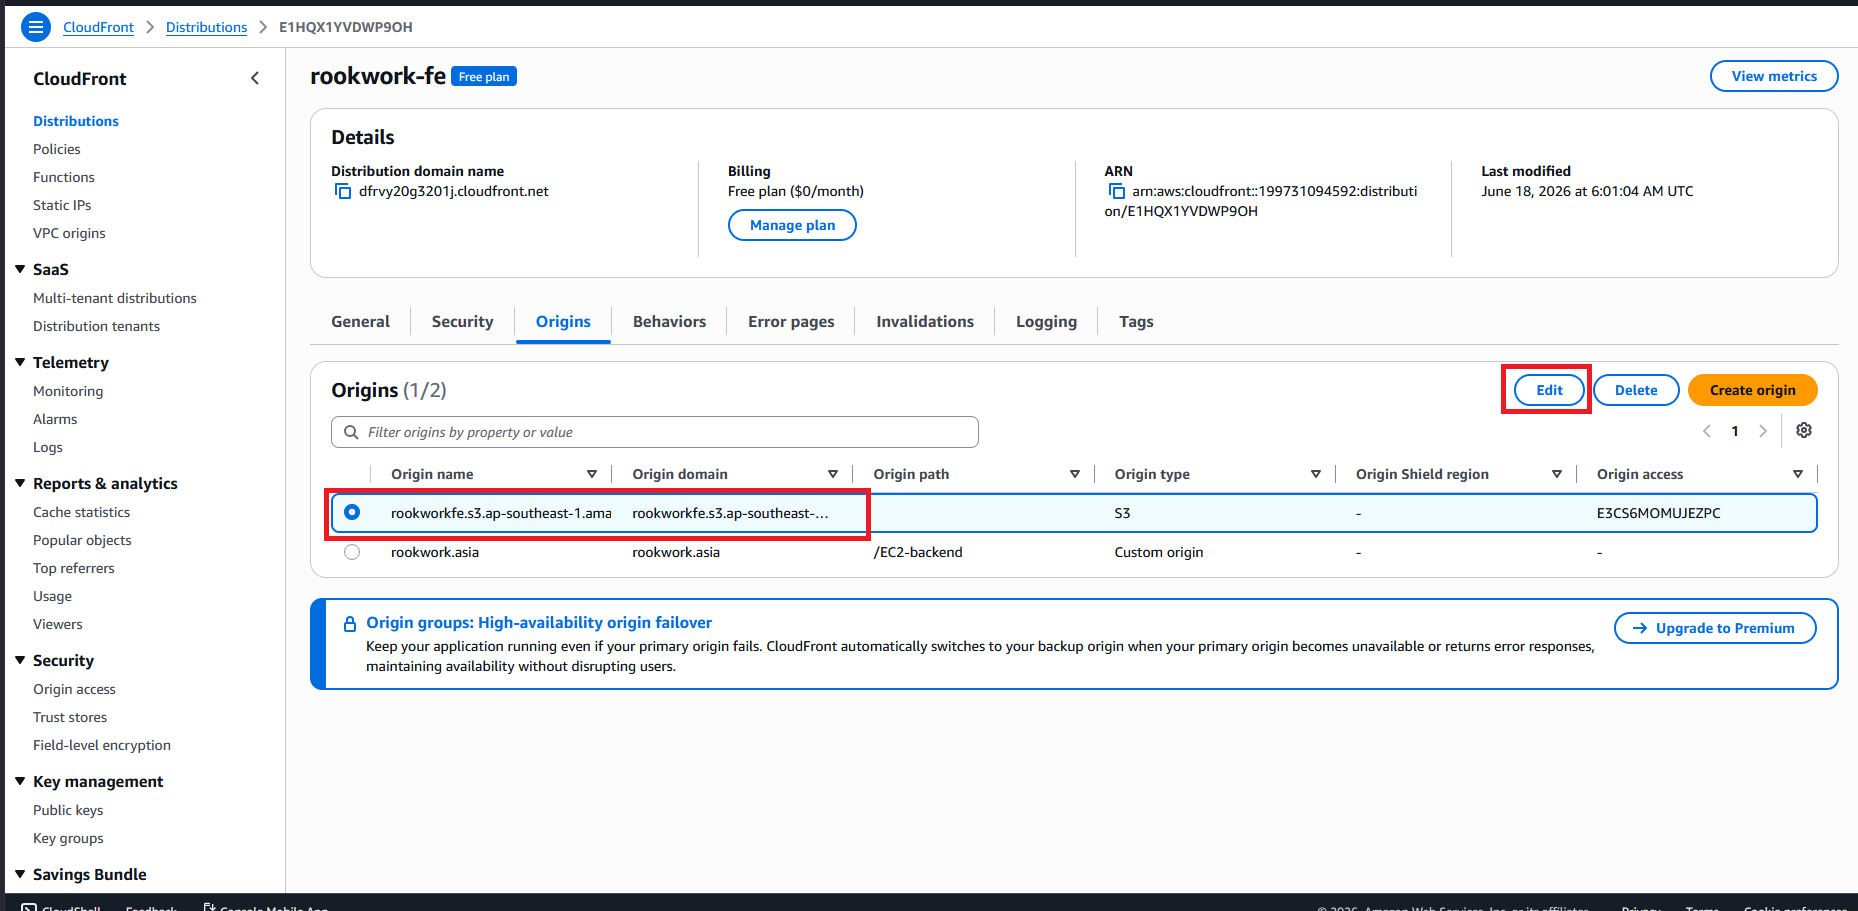
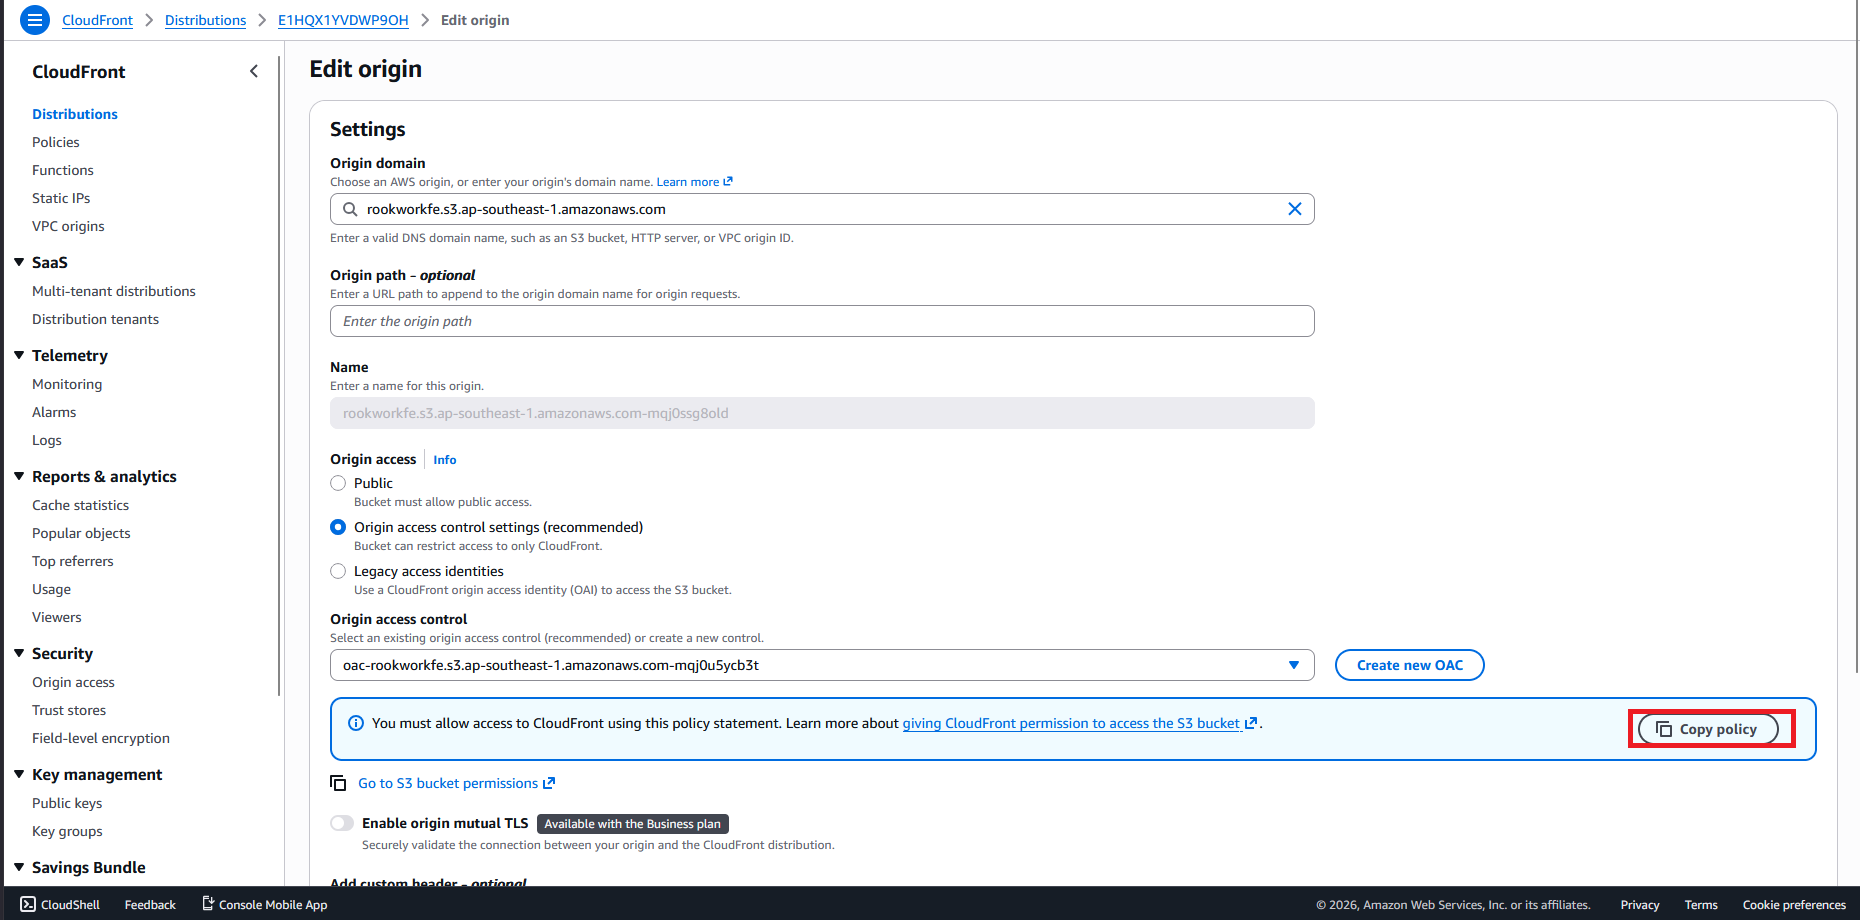
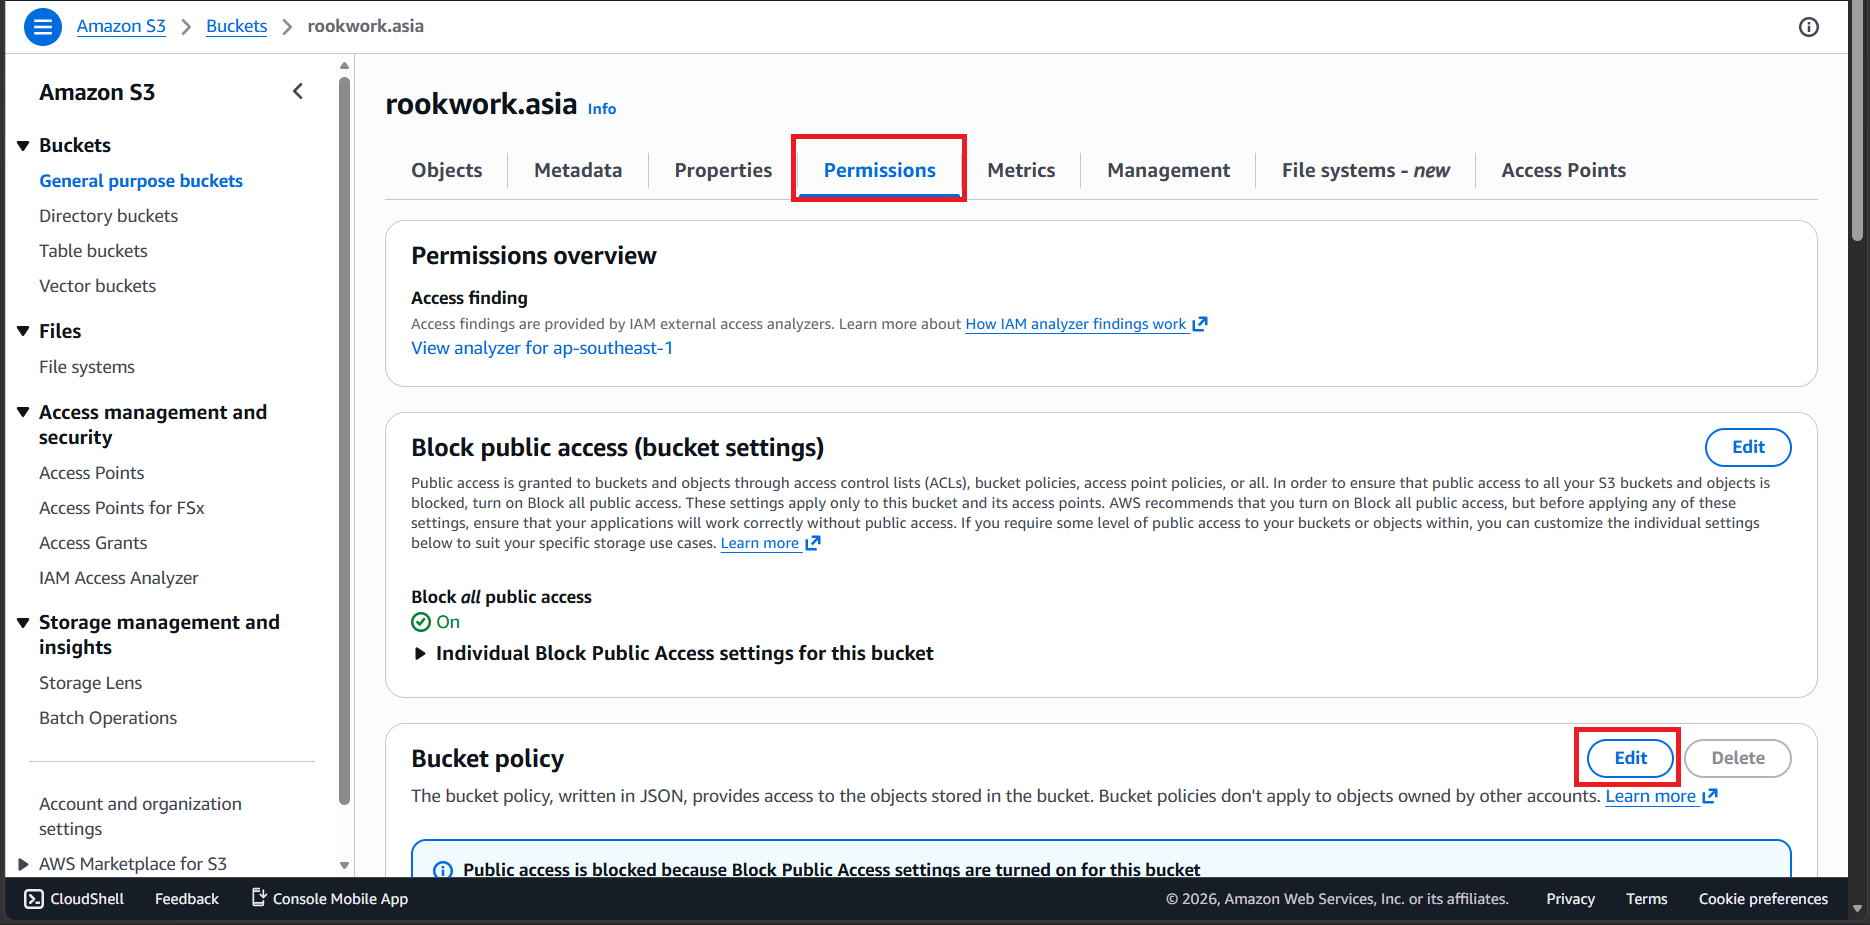
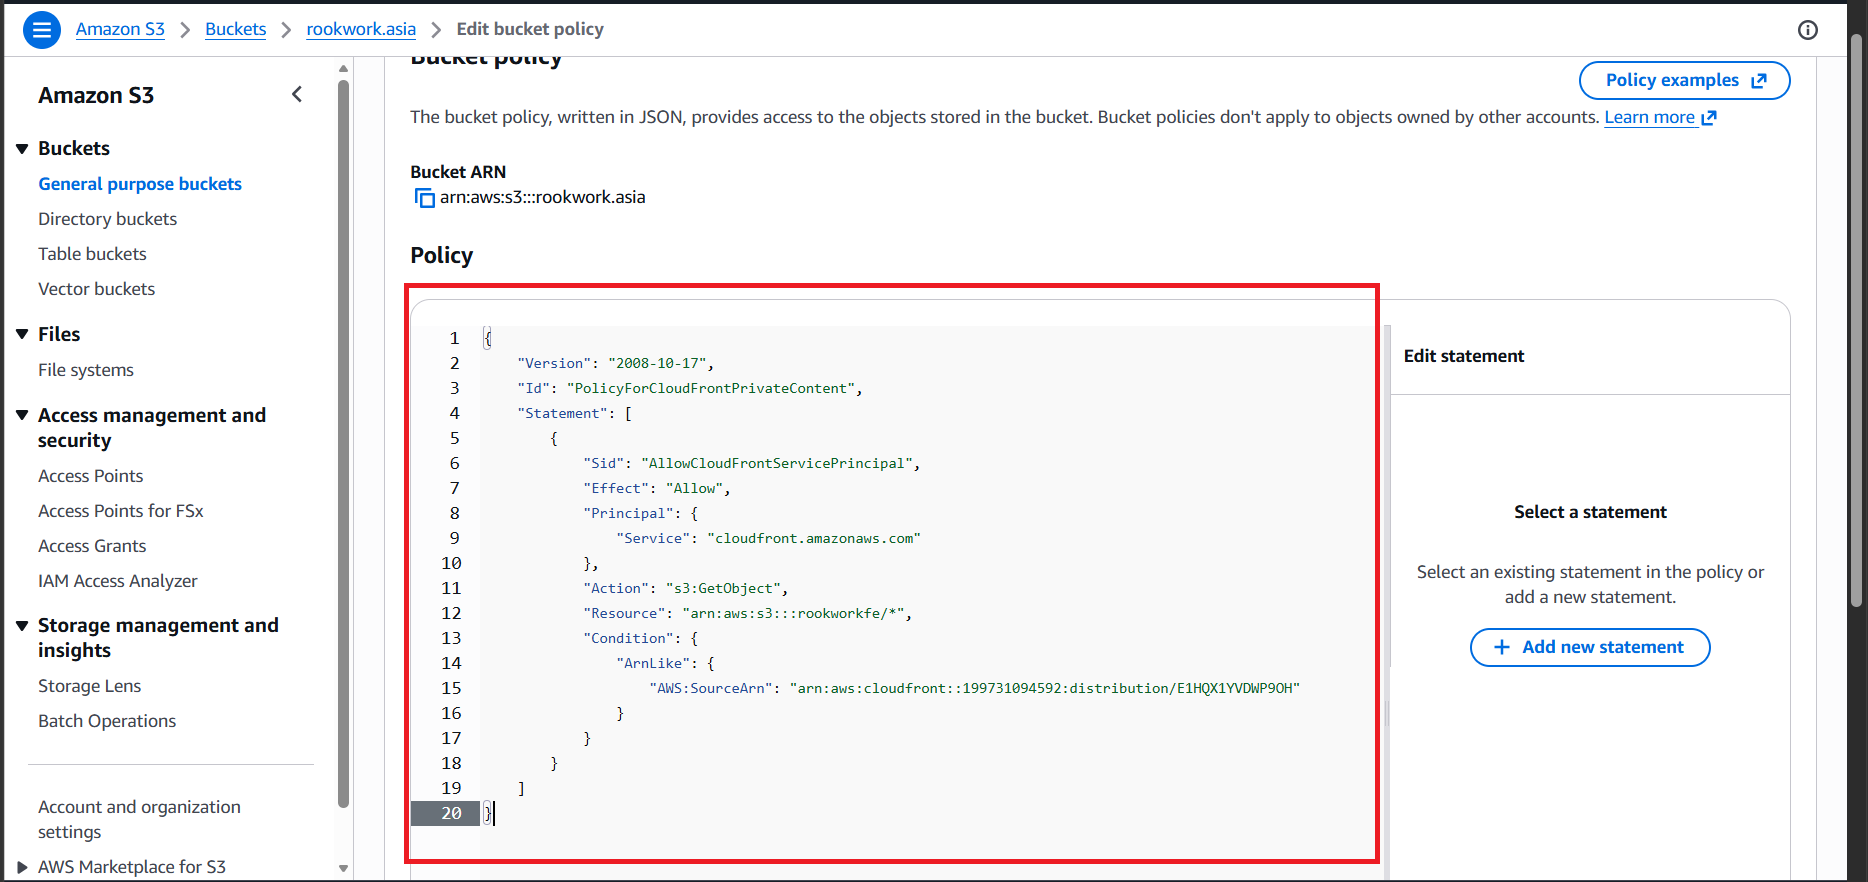
- Copy the suggested Bucket Policy JSON code from the CloudFront console, and paste it into the Permissions -> Bucket Policy tab of your S3 Bucket to grant CloudFront access to S3 files.
Step 3: Create DNS Record in Route 53 Pointing to CloudFront
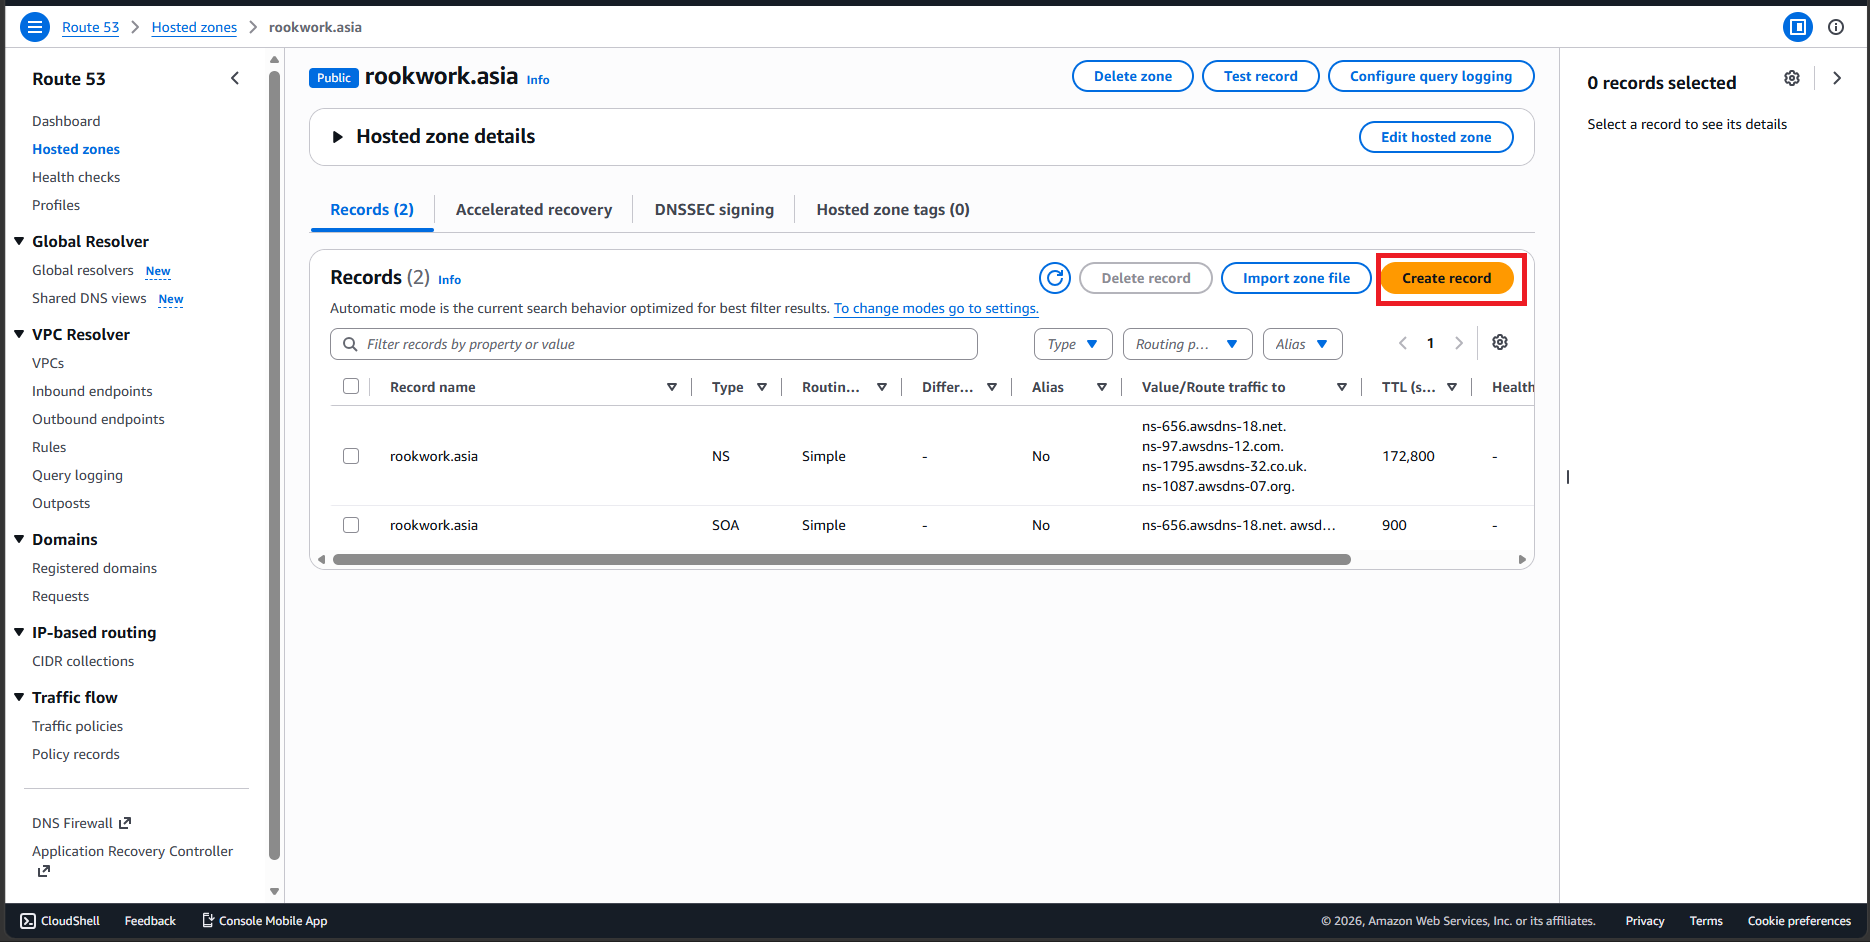
- Return to the Route 53 service and open the Hosted Zone for your domain.
- Click Create record.
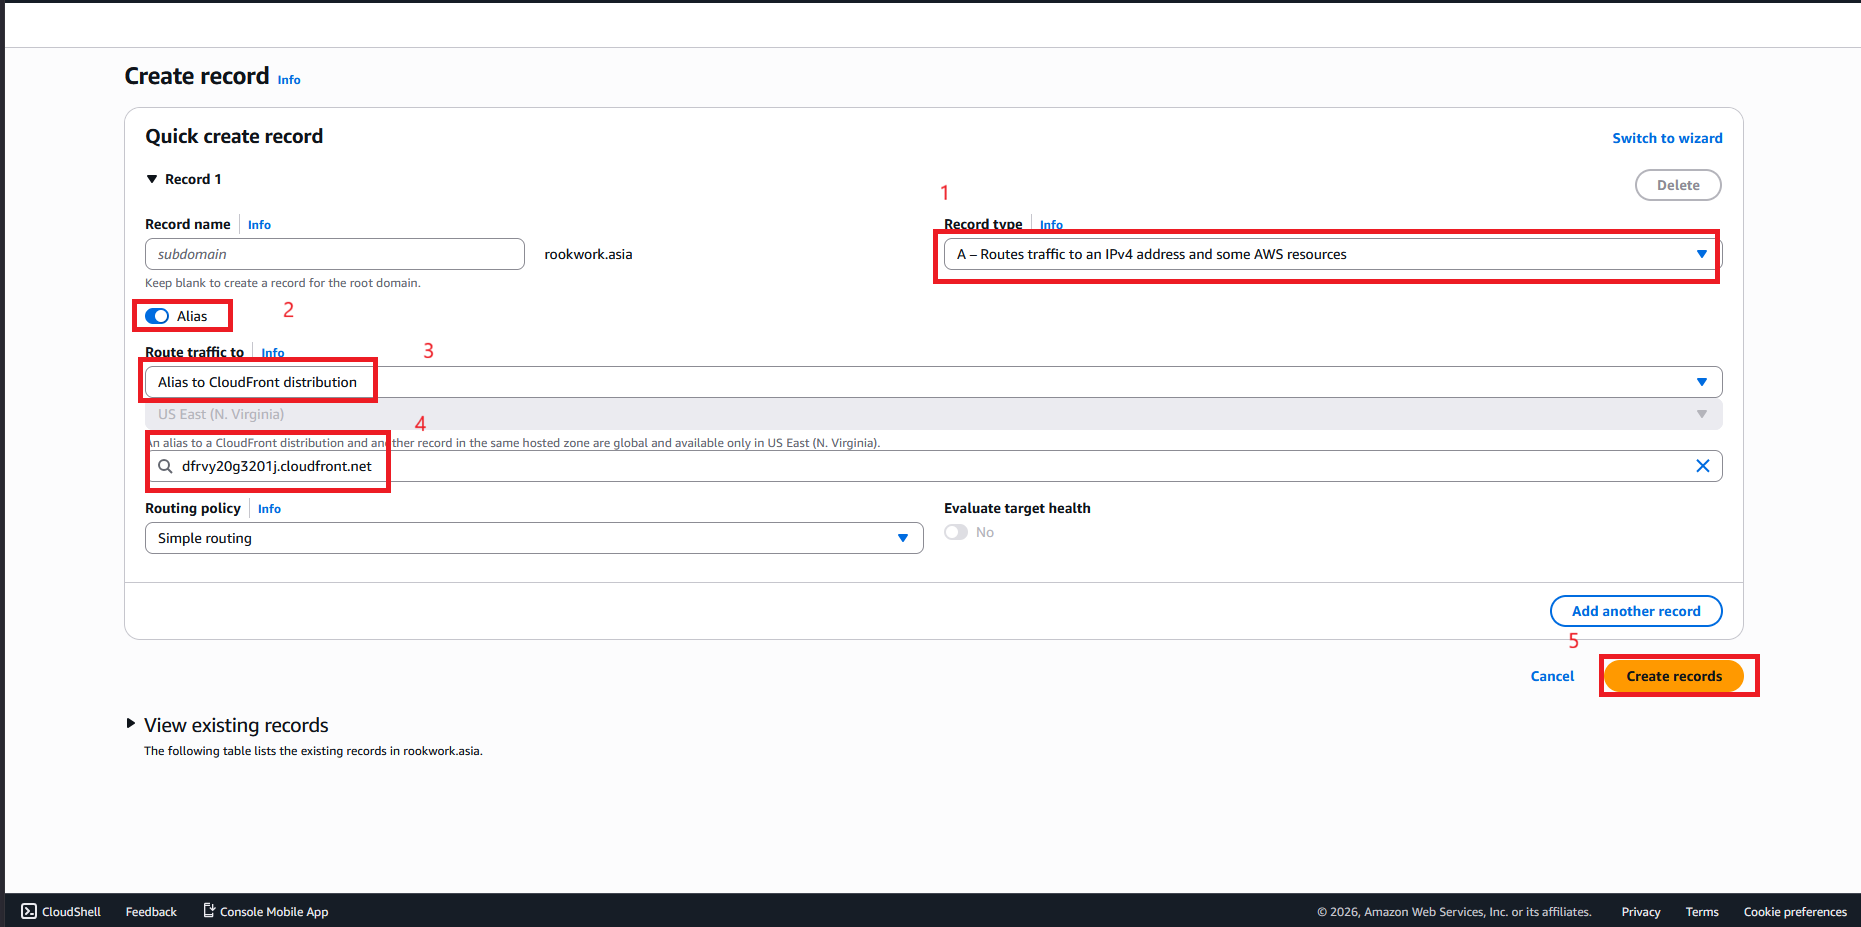
- Configure the record:
- Record name: Leave blank (for the apex domain
rookwork.asia). - Record type: Choose A - Routes traffic to an IPv4 address and some AWS resources.
- Alias: Enable (toggle switch to the right).
- Route traffic to: Choose Alias to CloudFront distribution -> Select the CloudFront distribution you created.
- Record name: Leave blank (for the apex domain
- Click Create records.
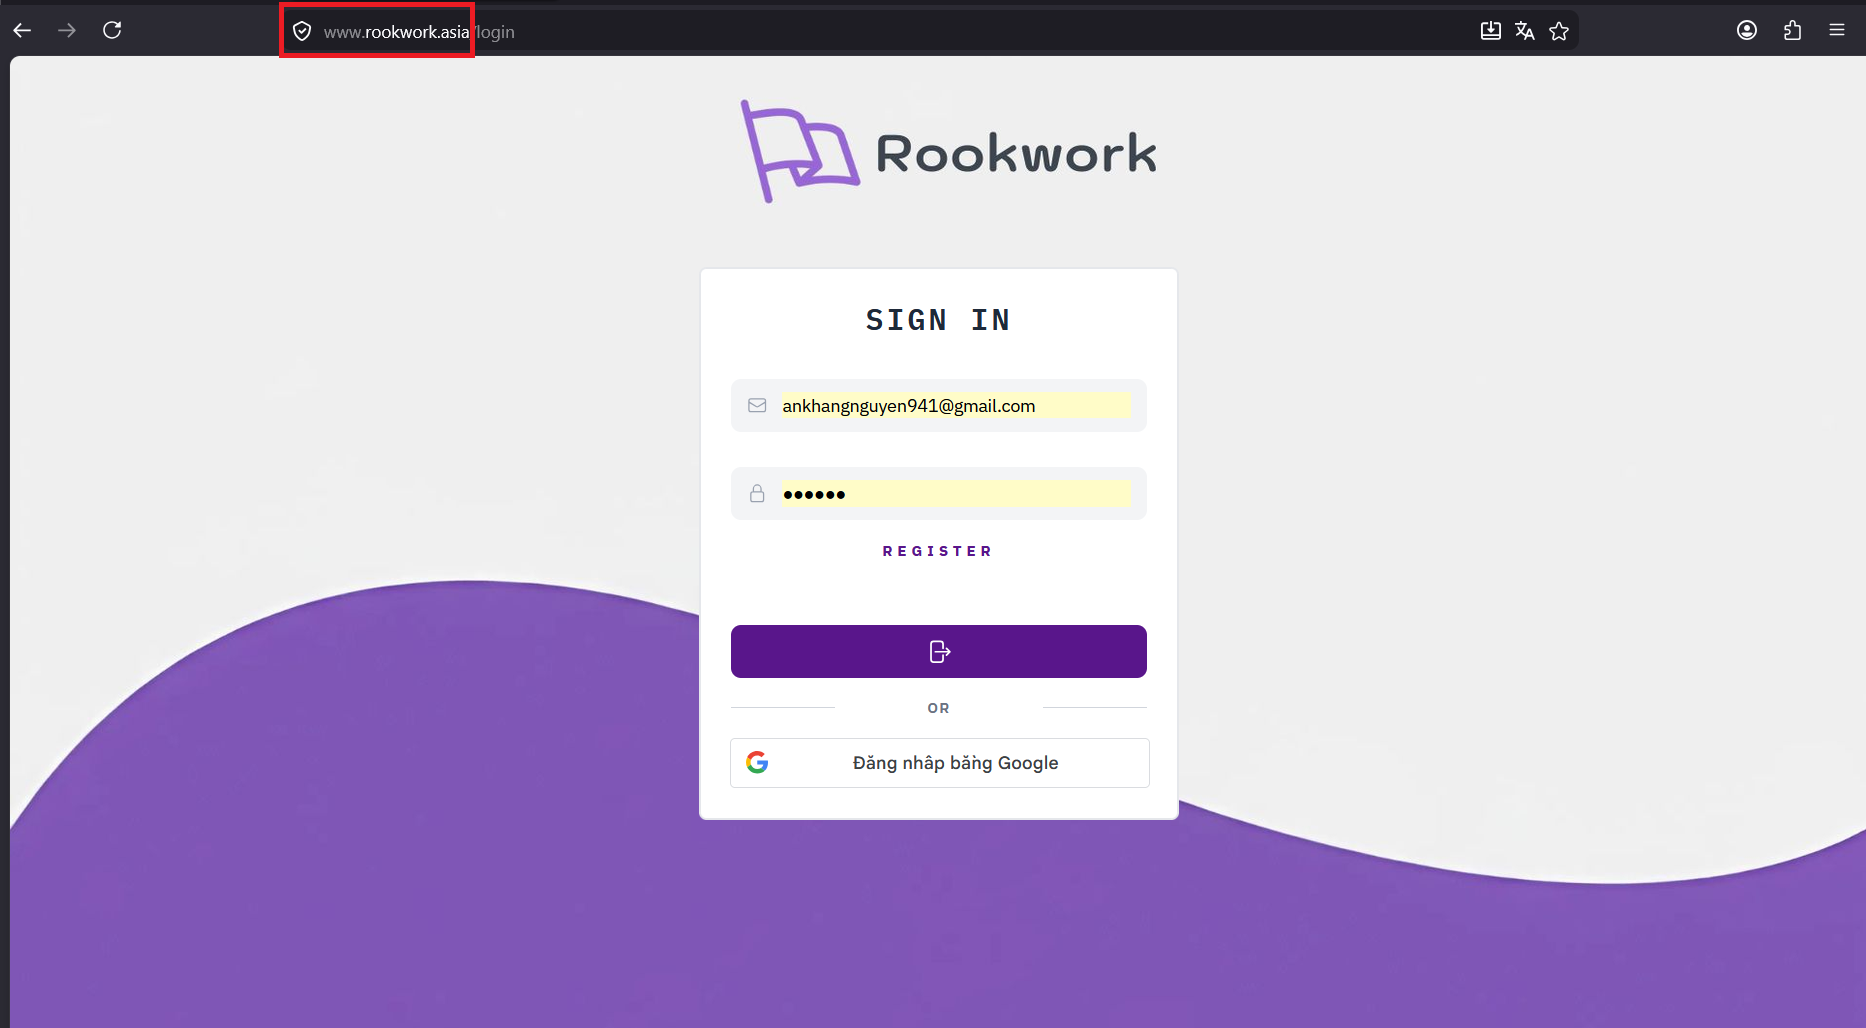
You can now access your website securely using HTTPS through your custom domain name!
Once the static website is live and secure via HTTPS, proceed to 5.7.4. Private File Storage with S3 to configure private storage for the Backend application.